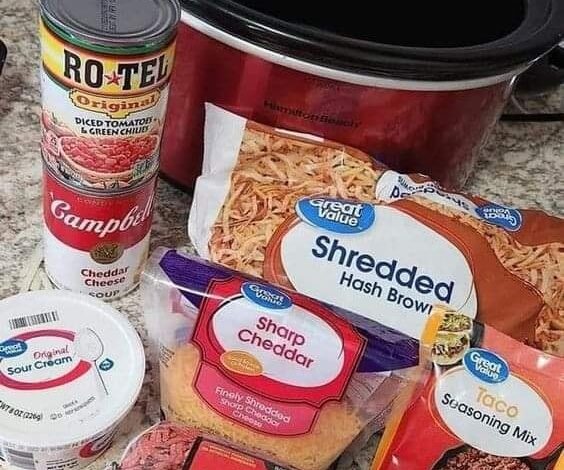
Welcome to the world of savory delights! In this article, we delve into the art of crafting the perfect TACO CROCK POT HASHBROWN CASSEROLE. Whether you’re a seasoned chef or a kitchen novice, this guide promises to unravel the secrets behind a dish that marries the flavors of tacos and the comfort of hashbrowns.
Ingredients:
INGREDIENT
QUANTITY
Ground beef
1 lb
Garlic minced
–
Cheddar cheese soup
–
Frozen shredded hashbrowns
–
Shredded taco style cheese
2 cups (divided)
Instructions:
Cook the Hamburger:
In a skillet, cook 1 lb of ground beef with taco seasoning, minced garlic, and diced onion until the beef is browned.
Combine Ingredients:
In a bowl, mix the cooked hamburger with diced tomatoes and green chiles, cheddar cheese soup, sour cream, and half of the shredded taco style cheese.
Add Hashbrowns:
Incorporate the frozen shredded hashbrowns into the mixture, ensuring an even distribution.
Transfer to Crock Pot:
Place the combined ingredients into a crock pot.
Cooking Time:
Set the crock pot to high for 2 hours or low for 4 hours. Allow the flavors to meld together, creating a delicious casserole.
Serve:
Once cooked, serve the TACO CROCK POT HASHBROWN CASSEROLE hot, garnished with the remaining shredded taco style cheese.
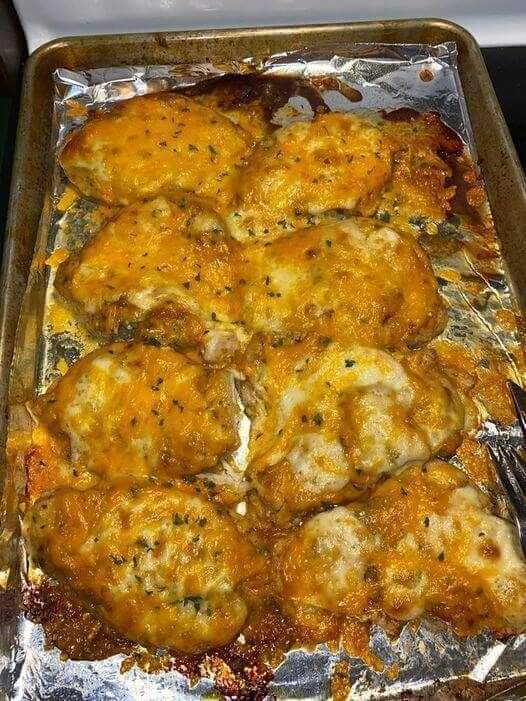
If you’ve ever dined at Outback Steakhouse, chances are you’ve fallen in love with their scrumptious Alice Springs Chicken. This delightful dish boasts tender grilled chicken topped with sautéed mushrooms, crispy bacon, melted cheese, and a honey mustard sauce that perfectly complements its flavors. In this article, we will present the complete Outback Steakhouse Alice Springs Chicken recipe along with a comprehensive table sheet format of the ingredients. Prepare to tantalize your taste buds and impress your family and friends with this delectable homemade version.
INGREDIENTS
QUANTITY
Boneless, skinless chicken breasts
4 pieces
Honey mustard sauce
1/2 cup
Sliced mushrooms
1 cup
Crispy cooked bacon
8 slices
Colby Jack cheese
1 cup
Cheddar cheese
1 cup
Dijon mustard
2 tablespoons
Worcestershire sauce
1 tablespoon
Paprika
1 teaspoon
Salt and pepper
To taste
Olive oil
2 tablespoons
Fresh parsley (optional)
For garnish
Cooking Instructions
Preheat your grill or stovetop pan over medium-high heat.
Season the chicken breasts with salt, pepper, and paprika on both sides.
In a small bowl, mix the honey mustard sauce, Dijon mustard, and Worcestershire sauce.
Brush the chicken breasts with the honey mustard mixture on both sides.
Place the chicken on the grill or pan and cook for about 6-7 minutes on each side, or until the chicken is cooked through and no longer pink in the center.
In a separate pan, sauté the sliced mushrooms with olive oil until they are tender and slightly browned.
Once the chicken is cooked, remove it from the grill or pan and set aside.
Preheat your broiler.
On each chicken breast, layer a generous amount of sautéed mushrooms, followed by two slices of crispy bacon.
Top the chicken with a mixture of Colby Jack and cheddar cheese.
Place the chicken under the broiler for about 2 minutes or until the cheese is melted and bubbly.
Garnish with fresh parsley if desired, and serve the OUTBACK STEAKHOUSE ALICE SPRINGS CHICKEN hot with your favorite side dishes.
Tips for a Perfect Outback Steakhouse Alice Springs Chicken
For the honey mustard sauce, you can use store-bought or make your own by combining equal parts of honey and Dijon mustard.
Marinating the chicken in the honey mustard mixture for a few hours before cooking will enhance its flavor.
Use thinly sliced chicken breasts for faster and more even cooking.
You can substitute the Colby Jack and cheddar cheese with your favorite cheese blend.
To ensure the bacon is crispy, cook it separately in a pan until it reaches your desired crispiness.
FAQs
Q: Can I use different types of cheese for this recipe?A: Absolutely! While the combination of Colby Jack and cheddar cheese is traditional, you can experiment with other cheeses like Swiss, provolone, or even pepper jack for a unique twist.
Q: Can I grill the chicken outdoors instead of using a stovetop pan?A: Yes, grilling the chicken outdoors will infuse it with a smoky flavor that adds an extra layer of deliciousness to the dish.
Q: How can I make the honey mustard sauce spicier?A: If you prefer a spicier sauce, add a pinch of cayenne pepper or a few dashes of hot sauce to the honey mustard mixture.
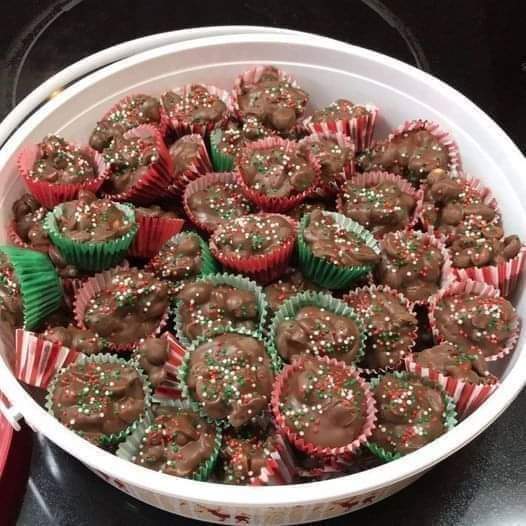
The holiday season is synonymous with delicious treats, and nothing says festive indulgence like Crockpot Christmas Crack. In this article, we’ll guide you through crafting this mouthwatering delight step by step. Get ready to elevate your holiday celebrations with a treat that’s easy to make and impossible to resist.
Ingredients:
INGREDIENTS
QUANTITY
Unsalted Peanuts
16 oz
Salted Peanuts
16 oz
Semi-sweet Chocolate Chips
1 Bag
Milk Chocolate Chips
1 Bag
Peanut Butter Chips
2 Bags
White Chocolate Bark or Wafers
2 Packages
Instructions:
Prepare the Base:
Place the unsalted and salted peanuts into the bottom of the slow cooker.
Layering the Goodness:
Cover the peanuts with the peanut butter chips.
Add the semi-sweet and milk chocolate chips.
Finishing Touch:
Layer the white chocolate bark or wafers on top.
Place the lid on the crockpot and cook on low for 1 hour.
Stirring and Setting:
Remove the lid, stir the mixture well, and place the lid back on to cook on low for an additional 30 minutes.
Cluster Creation:
Stir the mixture again and use a tablespoon to drop clusters onto pieces of parchment paper.
Final Touch:
Allow the candy clusters to harden and set for several hours.
Serve immediately or store in an airtight container. Candies can also be frozen for future use.
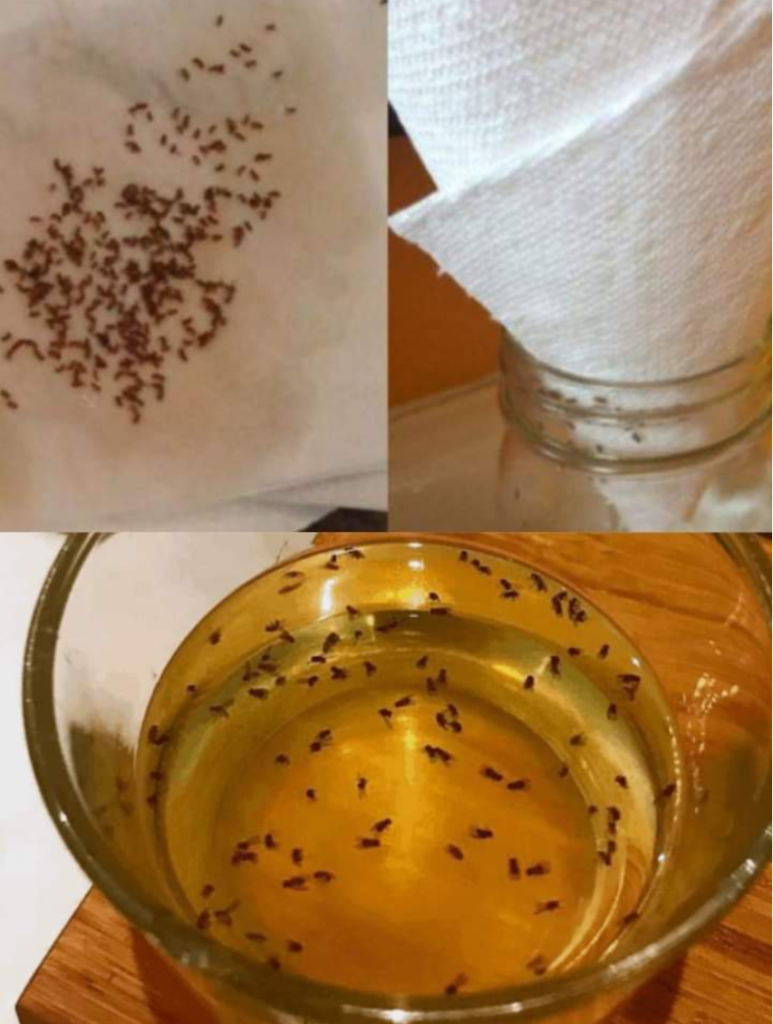
Are you finding yourself dealing with fruit flies invading your kitchen every summer? These pesky insects can quickly become a nuisance, as they lay eggs on the surfaces of bananas, mangoes, pineapples, and other ripe fruits. Within 5-6 days, these eggs turn into flies, leading to a rapid increase in their population and the potential to spread to other fruits. With the summer heat causing fruits to ripen faster, fruit flies find the perfect breeding ground. Did you know that each fly can lay up to 350 eggs per week? It’s no wonder that you can end up with a colony of fruit flies in no time!
However, fear not, for there is a plan to prevent their appearance and get rid of these unwanted roommates. Here are some effective steps you can take:
Store Fruits in the Fridge: To prevent fruit flies from laying eggs on your fruits, store most of your fruit in the refrigerator. The cold temperature will halt the hatching of eggs, keeping your fruits free from infestation.
Clean Kitchen Surfaces Regularly: Clean your kitchen counters, garbage cans, and sink often. Rinse your plates as soon as the meal is finished, as fruit flies are attracted to leftover food and often lay eggs in such areas. Additionally, they have a weakness for sugary liquids and alcoholic drinks, so make sure to clean up spills promptly.
Inspect and Clean Fruits: For fruits that you leave on the counter, such as bananas, make it a habit to rub them under water as soon as you bring them home from the grocery store. Dry them well with a clean cloth to eliminate any potential eggs.
Empty Compost Regularly: If you have a compost bin, make sure to empty it regularly and place the compost outside. If your compost bin is small, you can also keep it in the fridge or freezer.
Keep Kitchen Towels and Sponges Dry: After every use, ensure that your kitchen towels and sponges are dried properly. Moist places like these can serve as perfect nests for fruit flies, so washing them frequently is essential.
Trap the Flies: If you already have a fruit fly infestation, don’t panic. You can easily make a homemade trap to get rid of them:
In a bowl or glass, pour a small amount of beer, wine, or vinegar (balsamic, wine, or cider).
Cover the bowl or glass with plastic wrap and poke small holes in it to allow the fruit flies to enter.
Fruit flies will be attracted by the smell of the liquid, which resembles the scent of very ripe fruit they adore, and they will get trapped inside the container.
You can add a few drops of dish soap to the liquid to make it viscous and ensure that the flies remain trapped.
Empty the trap daily and repeat the process until there are no more flies inside. It may take about 1-2 weeks, but with perseverance, you can successfully get rid of fruit flies.
Once you have eradicated the fruit flies, continue following the prevention measures mentioned above to ensure they don’t return. With these tips, you’ll be fully equipped to face the fruit fly challenge this summer!
FAQs (Frequently Asked Questions)
Why do fruit flies appear in my kitchen every summer? Fruit flies are attracted to ripe fruits and vegetables, especially in warm and humid conditions. During the summer, the heat accelerates the ripening process of fruits, making them more appealing to fruit flies. These insects lay eggs on the surfaces of fruits, leading to a rapid increase in their population.
How can I prevent fruit flies from infesting my kitchen?To prevent fruit flies, store most of your fruits in the refrigerator, clean your kitchen surfaces regularly, and rinse fruits under water and dry them well to remove any potential eggs. Additionally, keep your kitchen towels and sponges dry, and promptly empty your compost outside.
Are fruit flies harmful to health?Fruit flies are not known to transmit diseases to humans, but they can contaminate food with bacteria and other microorganisms. It’s best to get rid of fruit flies to maintain a clean and hygienic kitchen environment.
Can I use pesticides to eliminate fruit flies?While pesticides can be effective in getting rid of fruit flies, it’s essential to avoid using harmful chemicals in areas where food is prepared. Instead, opt for natural and non-toxic methods, such as homemade traps using beer, wine, vinegar, or dish soap.
How long does it take to get rid of fruit flies using traps? It may take about 1-2 weeks to significantly reduce the fruit fly population using traps. Regularly emptying the traps and maintaining clean kitchen practices will hasten the process.
What if I don’t have plastic wrap for the fruit fly trap? If you don’t have plastic wrap, you can reuse the plastic wrap from a package of mushrooms or another vegetable you bought at the grocery store. Alternatively, you can use a small container with a lid and poke small holes in it for the fruit flies to enter.
Can fruit flies be attracted to other types of liquids besides beer, wine, and vinegar? Yes, fruit flies are attracted to various sweet and fermenting liquids. Besides beer, wine, and vinegar, you can use ripe fruit juice, fruit syrup, or a mixture of fruit and water in the trap.
What if I still have fruit flies after using traps and prevention methods? If fruit flies persist, reevaluate your kitchen practices and ensure that all fruits are stored properly in the fridge or cleaned thoroughly. Continue using traps and maintain cleanliness to reduce their population further.
Can fruit flies infest other areas of the house besides the kitchen?While fruit flies are most commonly found in the kitchen due to the presence of ripe fruits and food, they can infest other areas where organic matter is present. Be cautious and apply preventive measures throughout the house.
Are there any natural repellents to deter fruit flies from entering the kitchen?Yes, certain natural repellents like citrus essential oils or cloves can help deter fruit flies from entering the kitchen. Placing citrus peels or cloves near fruit bowls and kitchen entrances may discourage them from lingering.
Remember, consistency is key when dealing with fruit flies. By implementing preventive measures and using traps, you can successfully get rid of these pesky insects and enjoy a fruit fly-free kitchen throughout the summer!
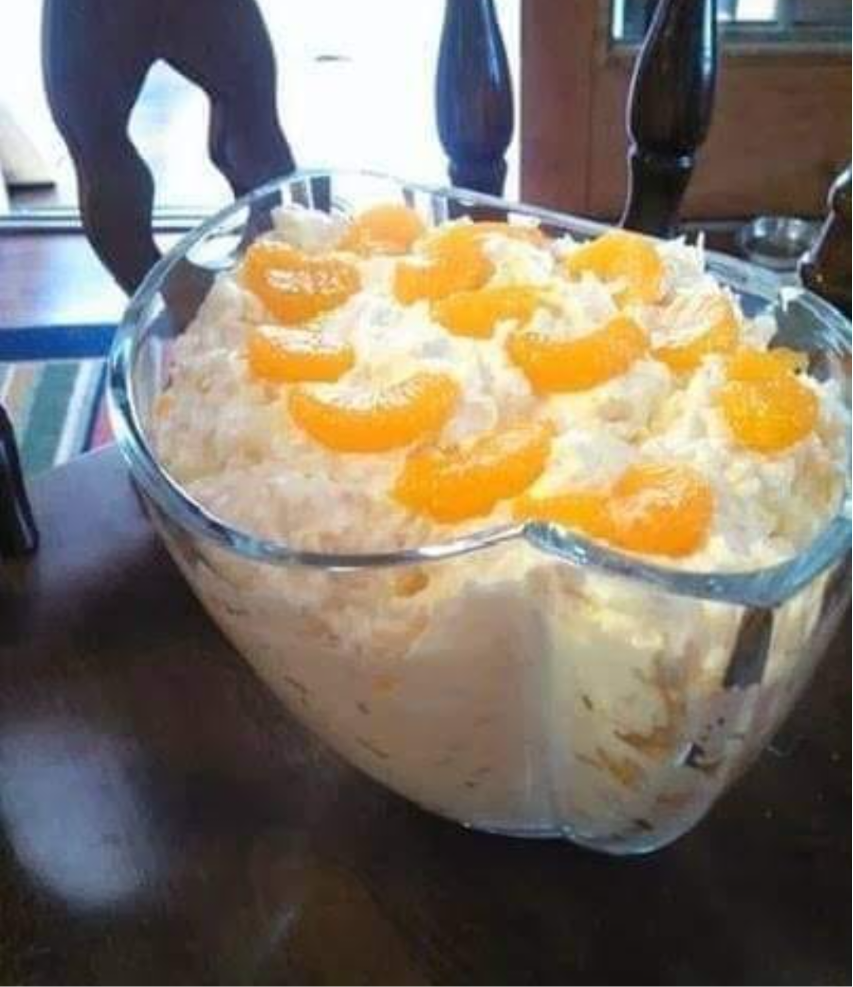
Indulge in the delightful combination of vanilla pudding, crushed pineapple, and mandarin oranges with this Mandarin Orange Salad recipe. Discover a simple, yet flavorful dish that can be enjoyed as a side or dessert. Make it your own by opting for healthier alternatives. Try it today!
Ingredients:
INGREDIENT
QUANTITY/DESCRIPTION
Vanilla Instant Pudding Mix (sugar-free)
1 package (dry)
Crushed Pineapple (undrained)
1 large can
Mandarin Oranges (drained)
2 medium/large cans
Cool Whip 8 oz (fat-free recommended)
1 package
Instructions:
Prepare the Base:
In a mixing bowl, combine the Cool Whip and dry Vanilla Instant Pudding Mix. Do not prepare the pudding; use it dry.
Add Fruits:
Incorporate the undrained Crushed Pineapple into the mixture.
Include Mandarin Oranges:
Add the drained Mandarin Oranges to the bowl. Adjust the quantity based on your preference.
Mix Thoroughly:
Gently mix all the ingredients until well combined, ensuring an even distribution of flavors.
Refrigerate:
Cover the bowl and refrigerate the salad for a couple of hours. This allows it to thicken and enhances the overall texture.
Serve and Decorate:
Once chilled and thickened, your Mandarin Orange Salad is ready to be served. Save a few Mandarin Oranges to decorate the top for an appealing presentation.
Versatile Serving:
Enjoy the salad as a delightful side dish with your meal or elevate it to a dessert by serving it alongside ice cream.
Healthier Options:
For a healthier version, choose sugar-free Instant Pudding Mix, opt for fat-free Cool Whip, and use fresh mandarins.
Personalize Your Salad:
Experiment with the recipe to find your preferred balance of ingredients. Consider using whipped Cool Whip for a lighter texture.
Try and Explore:
Give this Mandarin Orange Salad a few tries to discover the combination that suits your taste buds best. Whether it’s a family meal or a special occasion, this salad is a versatile and delightful addition.
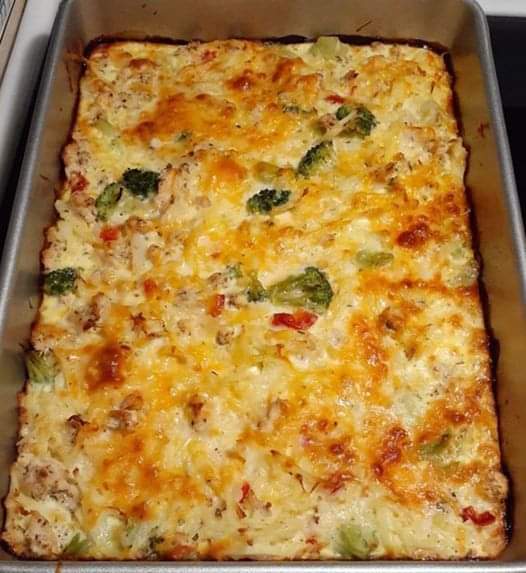
In the hustle and bustle of the holiday season, a Christmas Breakfast Casserole emerges as a lifesaver. Its versatility, time-saving benefits, and crowd-pleasing flavors make it a perfect choice for a festive morning. Whether you’re hosting a family gathering or enjoying a cozy Christmas with loved ones, this dish ticks all the boxes.
Ingredients:
INGREDIENTS
QUANTITY
Ground sausage
1 lb
Mustard powder
1 tsp
Kosher salt
½ tsp
Large eggs, beaten
4
Whole milk
2 C
White bread, toasted & cubed
6 slices
Mild Cheddar cheese, shredded
1 C
Instructions:
Crumble Sausage:
In a medium skillet, crumble the ground sausage.
Cook over medium heat until evenly browned; drain any excess fat.
Prepare Flavor Base:
In a medium bowl, combine mustard powder, kosher salt, beaten eggs, and whole milk.
Mix Ingredients:
Add the browned sausage, toasted bread cubes, and shredded Cheddar cheese to the bowl.
Stir well to coat all ingredients evenly.
Transfer to Baking Dish:
Pour the mixture into a greased 9×13 inch baking dish, creating a uniform layer.
Chill in Refrigerator:
Cover the baking dish and chill in the refrigerator for 8 hours or overnight.
Preheat Oven:
Preheat the oven to 350 degrees Fahrenheit.
Bake Covered:
Cover the baking dish and bake for 45 to 60 minutes until a golden-brown crust forms.
Uncover and Reduce Temperature:
Uncover the dish and reduce the oven temperature to 325 degrees Fahrenheit.
Bake Uncovered:
Continue baking for an additional 30 minutes or until the casserole is set.
Cut and Serve:
Once baked to perfection, cut the Christmas Breakfast Casserole into portions and serve.
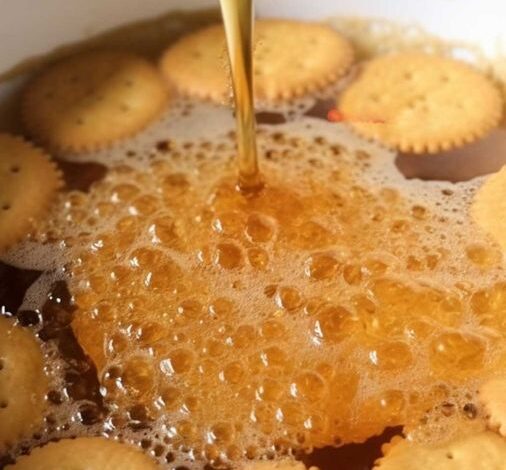
‘Tis the season for festive treats, and what better way to indulge your taste buds than with a delightful Christmas Crack? This sweet-salty confection combines the buttery crunch of Ritz crackers with a luscious layer of caramel and a generous topping of chocolate and candies. In this article, we’ll guide you through the steps of creating this delectable treat that is sure to be a hit at your holiday celebrations.
Unwrapping the Ingredients
Let’s dive into the key players that make Christmas Crack an irresistible delight.
INGREDIENTS
QUANTITY
Ritz crackers
1 sleeve
Unsalted butter
1/2 cup
Packed brown sugar
1/2 cup
Chocolate chips
1 cup
Your choice of candy topping
As desired
Baking Magic: Step-by-Step Instructions
Follow these steps to transform simple ingredients into a Christmas Crack masterpiece.
Preheat and Prep
Preheat your oven to 425°F (220°C).
Line an 8×8 inch baking dish with parchment paper.
Cracker Canvas
Lay the Ritz crackers in a single layer in the prepared dish.
Caramel Creation
In a saucepan, melt butter and brown sugar, bringing it to a boil.
Boil for 3 minutes without stirring.
Caramel Cascade
Evenly pour the caramel mixture over the crackers.
Bake for 5 minutes to set the caramel.
Chocolate Charm
Remove from the oven, scatter chocolate chips over the top.
Return to the oven for 2 minutes to soften the chocolate.
Even Spread
Spread the melted chocolate evenly across the cracker surface.
Topping Temptation
Add your choice of candy topping, embracing creativity.
Chill and Break
Let it cool and then break into smaller, delightful pieces.
For quicker cooling, refrigerate it.
Savor the Flavor
Enjoy this delectable Christmas Crack, a perfect sweet-salty treat to brighten your holiday celebrations.
Insights and Experiences
As someone who has experienced the joy of creating Christmas Crack, I can attest to its simplicity and crowd-pleasing qualities. The combination of buttery crackers, rich caramel, and luscious chocolate creates a harmony of flavors that is simply irresistible. It’s a treat that sparks joy and brings people together during the festive season.
In conclusion, Christmas Crack is more than just a treat; it’s a symbol of joy and togetherness during the holiday season. With a straightforward recipe and room for creative customization, it’s a delightful addition to your festive table. So, gather your ingredients, follow the simple steps, and indulge in the magic of Christmas Crack this holiday season.
In a medium bowl combine sugar, yeast, and milk and stir to dissolve.
Whisk in egg. Add flour and salt, and start to mix the dough with a spatula. Then continue to knead it with your hands until you receive an elastic dough.
Add softened butter and continue to knead until butter is fully incorporated into the dough.
Form a ball from the dough, cover with a kitchen cloth or plastic wrap, and allow to rise for an hour.
Divide the dough into 8 parts and roll each into a ball. Cover and let sit for 30 minutes.
Flatten each ball a bit and roll it again into a ball. Cover and let sit for another 30 minutes.
Fry balls in hot oil on low for 2-3 minutes on each side.
Let cool a bit and cut in half lengthwise, like a burger bun.
Top one half with whipped cream and chopped strawberries, close with the other half, sprinkle with powdered sugar and serve.
Second recipe:
Here’s a recipe for strawberry bombs, a delicious and simple dessert that’s perfect for any occasion:
Ingredients:
1 pound fresh strawberries, washed and hulled
8 oz cream cheese, softened
1/2 cup powdered sugar
1 tsp vanilla extract
1 cup graham cracker crumbs
1/4 cup unsalted butter, melted
Whipped cream, for topping (optional)
Instructions:
Preheat your oven to 350°F.
In a small bowl, combine the graham cracker crumbs and melted butter until well blended.
Using a spoon, press the mixture into the bottom and sides of a muffin tin, making sure to press down firmly.
Bake for 5-7 minutes, or until golden brown. Remove from the oven and let cool.
In a mixing bowl, beat the cream cheese, powdered sugar, and vanilla extract until smooth.
Using a piping bag or a spoon, fill each graham cracker crust with the cream cheese mixture.
Cut the strawberries in half and place one half on top of each cream cheese-filled crust.
Chill the strawberry bombs in the fridge for at least 30 minutes.
Before serving, you can add a dollop of whipped cream on top of each strawberry bomb.
Your strawberry bombs are ready to serve! Enjoy their sweet and tangy flavors!
If you’ve ever craved a delightful pastry that perfectly balances sweet and savory flavors, then the Crescent Cheese Danishes Recipe is a must-try! This delectable treat combines the light, flaky texture of crescent dough with a rich and creamy cheese filling, creating a mouthwatering experience that you won’t be able to resist. In this article, we’ll guide you through the process of creating these heavenly danishes step by step. From the essential ingredients to the baking instructions, we’ve got you covered!
INGREDIENTS
QUANTITY
Crescent roll dough
1 package
Cream cheese
8 ounces
Granulated sugar
1/2 cup
Vanilla extract
1 teaspoon
Lemon zest
1 teaspoon
Egg
1
Fruit preserves (optional)
1/4 cup
Powdered sugar (for dusting)
As needed
Unveiling the Recipe: How to Make Crescent Cheese Danishes
Prepare to embark on a culinary journey that will tantalize your taste buds and impress your loved ones. Follow these simple steps to create Crescent Cheese Danishes that are nothing short of perfection:
1. Preheat and Prepare
Preheat your oven to 375°F (190°C) and line a baking sheet with parchment paper.
2. Unroll the Crescent Dough
Carefully unroll the crescent roll dough and separate it into triangles. Lay them out on the prepared baking sheet.
3.Create the Cream Cheese Filling
In a mixing bowl, blend the cream cheese, granulated sugar, vanilla extract, and lemon zest until smooth and creamy.
4. Assemble the Danishes
Place a spoonful of the cream cheese mixture onto the wide end of each crescent triangle. Optionally, add a dollop of fruit preserves on top of the cream cheese.
5. Roll and Seal
Gently roll up the triangles, starting from the wide end, to create a crescent shape. Ensure the filling is securely enclosed.
6. Brush with Egg Wash
In a small bowl, beat the egg and brush it over the tops of the danishes. This will give them a beautiful golden brown finish when baked.
7. Bake to Perfection
Place the baking sheet in the preheated oven and bake for 12-15 minutes, or until the danishes are puffed up and golden brown.
8. Dust with Powdered Sugar
Once out of the oven, let the danishes cool slightly before dusting them with powdered sugar.
Elevate Your Baking Game with Crescent Cheese Danishes
Whether you’re a seasoned baker or just starting your culinary journey, the Crescent Cheese Danishes Recipe is a fantastic addition to your repertoire. The delicate layers of buttery crescent dough enveloping the luscious cream cheese filling are a testament to the art of pastry-making.
Now, let’s address some common questions that might arise as you embark on your Crescent Cheese Danishes adventure:
FAQs
Q: Can I use other fruit preserves besides the ones mentioned in the recipe?
Absolutely! While the recipe suggests fruit preserves, you can get creative and use your favorite flavors. Raspberry, blueberry, or apricot preserves would all work wonderfully.
Q: How do I store leftover Crescent Cheese Danishes?
A: To keep your danishes fresh, store them in an airtight container in the refrigerator. When ready to enjoy, gently reheat them in the oven to restore their delightful flakiness.
Q: Can I freeze Crescent Cheese Danishes?
A: Yes, you can freeze both unbaked and baked danishes. If freezing unbaked danishes, assemble them and freeze on a baking sheet before transferring to a freezer-safe bag. When you’re ready to indulge, simply bake from frozen, adding a few extra minutes to the baking time.
Q: Can I make a glaze for the danishes?
A: Absolutely! A simple glaze made with powdered sugar, milk, and vanilla extract can add an extra layer of sweetness. Drizzle it over the danishes once they’ve cooled slightly.
Q: How can I customize the filling?
A: While the classic cream cheese filling is divine, you can experiment with different ingredients. Consider adding a layer of chocolate chips, chopped nuts, or even a swirl of Nutella for a decadent twist.
Q: Can I use homemade crescent dough?
A: Of course! If you prefer to make your own crescent dough from scratch, go ahead and showcase your baking prowess. The end result will be equally delicious.
Indulge in the magic of baking by creating your own Crescent Cheese Danishes. This recipe is your gateway to crafting a treat that exquisitely combines textures and flavors, resulting in a pastry that’s both comforting and luxurious. From the flaky layers of dough to the velvety cream cheese filling, each bite is a symphony of delight. So, gather your ingredients, preheat your oven, and let your kitchen be filled with the tantalizing aroma of freshly baked Crescent Cheese Danishes. Get ready to embark on a journey of culinary excellence!
If you enjoyed this article, show your appreciation by hitting the like button!
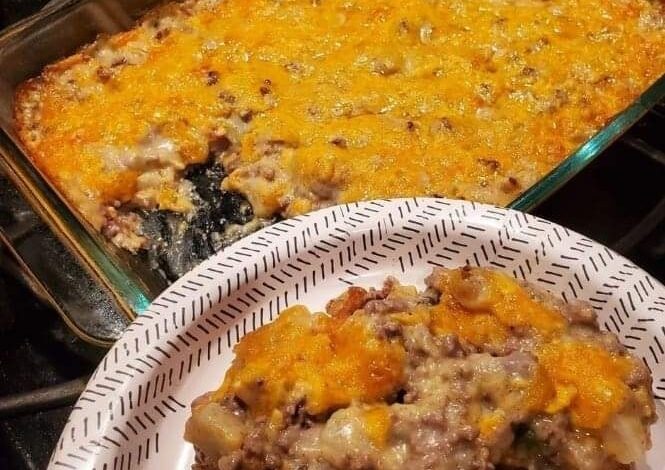
Ground Beef Casserole is a comforting dish that brings warmth and flavor to any table. In this article, we explore the art of creating the perfect Ground Beef Casserole, providing you with a step-by-step guide and insights into why this dish deserves a spot in your culinary repertoire.
Ingredients:
Creating a delightful Ground Beef Casserole begins with the right ingredients. Here’s what you’ll need:
INGREDIENTS
QUANTITY
Ground beef
1-1/2 to 2 pounds
Cream of condensed mushroom soup
10.5 ounces
Cream of cheddar cheese soup
10.5 ounces
Cubed frozen potatoes
3 cups
Shredded cheddar cheese (divided)
1 cup
Salt
To taste
Pepper
To taste
Instructions:
Follow these simple steps to bring your Ground Beef Casserole to life:
Preheat Oven: Preheat the oven to 350 degrees.
Cook Ground Beef: Cook the ground beef, drain the grease, and add it to a large mixing bowl.
Add Soups: Add the cream of mushroom and cream of cheddar cheese soup to the bowl.
Include Potatoes: Add the frozen cubed potatoes to the bowl.
Add Cheese: Add 1/2 cup of shredded cheddar cheese to the bowl.
Seasoning: Add a pinch of salt and pepper. Mix everything thoroughly.
Transfer to Casserole Dish: Pour the mixture into a greased 9″ x 13″ casserole dish.
Top with Cheese: Sprinkle the remaining shredded cheddar cheese on top.
Cover and Bake: Cover with tin foil and bake for 30 minutes. Carefully remove the foil and bake for an additional 30 minutes.