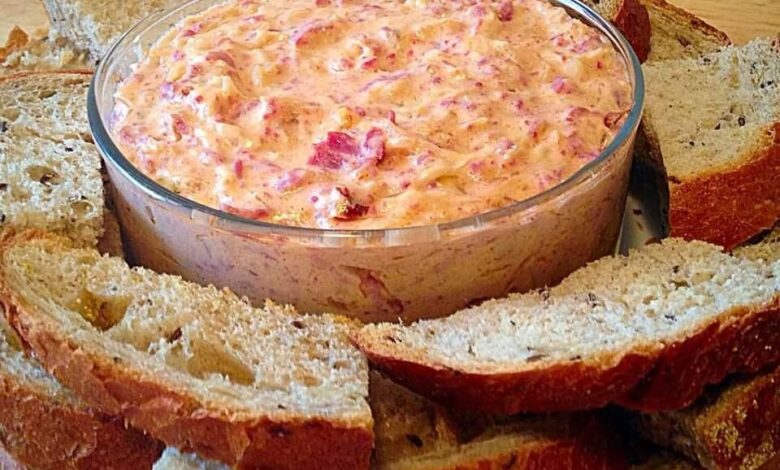
Slow Cooker Reuben Dip is a tantalizing twist on the classic Reuben sandwich, offering all the flavors you love in a convenient, dippable form. Whether you’re hosting a game day get-together or a cozy evening with friends, this dish is sure to impress your guests. In the following sections, we will guide you through the process of creating this culinary masterpiece.
Ingredients:
To start, gather the following ingredients:
INGREDIENT
QUANTITY
Cream cheese, softened
8 ounces
Shredded Swiss cheese
1 cup
Sauerkraut, drained and squeezed dry
1 cup
Thousand Island dressing
1/2 cup
Chopped corned beef
1/2 cup
Worcestershire sauce
1 teaspoon
Rye bread or crackers, for serving
–
These ingredients are the building blocks of your Slow Cooker Reuben Dip and will deliver a medley of flavors that will leave your guests craving for more.
Instructions:
Now, let’s get cooking:
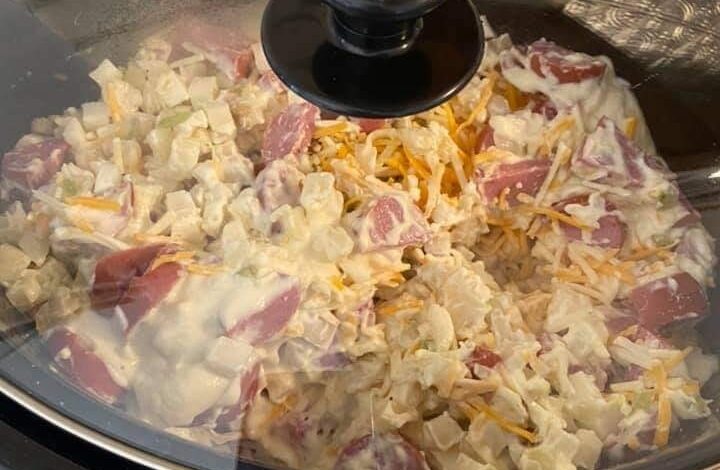
In your slow cooker, combine the softened cream cheese, shredded Swiss cheese, sauerkraut, Thousand Island dressing, chopped corned beef, and Worcestershire sauce. Stir until well combined.
Cover the slow cooker and cook on low heat for 2-3 hours, or until the cheeses are melted and the dip is heated through. Stir occasionally to ensure even heating.
Once the dip is hot and bubbly, reduce the slow cooker to the warm setting to keep the dip warm during serving.
Serving Your Reuben Dip
When it’s time to serve, get creative with your presentation. Slow Cooker Reuben Dip pairs wonderfully with rye bread or crackers for dipping. You can also consider adding some fresh vegetables like celery or bell peppers for a refreshing contrast. Your guests will appreciate the effort you put into making this dish both delicious and visually appealing.
Probably due to the fact hat it is far different from other non-prescription treatments, Vicks VapoRub is incredibly popular over-the-counter medicine, which treats ailments with vapors.
According to Bridie Cavanaugh at eHow, its three main ingredients, menthol, camphor, and eucalyptus oil relieve a cough and congestion through inhalation. Additionally, it also acts as an effective topical analgesic.
Yet , this product offers various other benefits, and can provide surprising effects in the following cases:
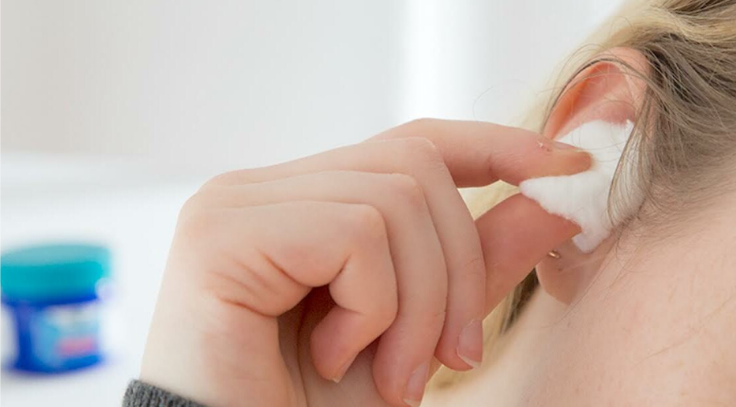
1. Earaches
In most cases, the earache is a result of an ear infection or a common cold. Yet, the pain in the ear is debilitating and makes it very hard to fall asleep. However, you can use Vicks VapoRub to soothe the pain, All you need to do is to rub a little on a cotton ball, put it in the ear, and leave it to act overnight.
2. Muscle aches
You should massage the painful area with this product, and wrap it in a dry, warm towel for dome time, to improve the positive effects.
3. Headaches
In the case of a common headache, just apply some Vicks to the temples to soothe the headache fast, In the case of a sinus headache, put a bit of this ointment under the nose and breathe in slowly and deeply.
4. Cracked heels
To make your heels soft again, just apply Vicks in the evening, and massage the problematic areas. Leave it to act overnight, and in the morning, rinse with warm water and exfoliate with a pumice stone.
5. Heal bruises and minor cuts
To accelerate the healing process, just run it around smaller cuts, but avoid its use in the case fo open wounds and damaged skin. For bruises, apply a thin layer of Vicks and salt, which will improve blood circulation and heal them fast.
6. Toenail fungus
Rub the infected areas with VapoRub 2-3 times daily for several weeks or even a few months, and you will fight the fungus.
7. Keep animals at bay
If you want to avoid the scratches of your cat on the doors, couch, and curtains, just dab the furniture with it.
8. Repel bugs
Rub some of it on the insect bites o relieve the itching, and apply a bit of Vicks to your clothing and skin to protect yourself from bugs.
Kentucky Butter Cake is a beloved dessert that has captured the hearts and taste buds of many dessert enthusiasts. With its rich, buttery flavor and moist texture, this cake is a true indulgence. In this article, we will dive into the world of Kentucky Butter Cake, exploring its history, ingredients, baking techniques, and variations. So, get ready to satisfy your sweet tooth and embark on a journey through the delectable realm of Kentucky Butter Cake.
The Origins of Kentucky Butter Cake Every mouthwatering dessert has a story to tell, and Kentucky Butter Cake is no exception. This delightful treat originated in the heart of the Bluegrass State, Kentucky, where it quickly became a local favorite. The cake’s origins can be traced back to the Southern culinary traditions that emphasize rich flavors and comforting textures. Over the years, the recipe has been passed down through generations, gaining popularity and acclaim.
Ingredients that Make the Difference Kentucky Butter Cake owes its distinctive taste and texture to a unique combination of ingredients. Let’s take a closer look at the key components that make this cake an absolute delight:
All-Purpose Flour: The foundation of any cake, all-purpose flour provides structure and stability to the batter.
Granulated Sugar: Sweetness is essential in any dessert, and granulated sugar adds the perfect amount of sweetness to the cake.
Butter: As the star ingredient, butter lends its rich, creamy flavor to the cake, giving it a melt-in-your-mouth texture.
Eggs: Eggs play a crucial role in binding the ingredients together and adding moisture to the cake.
Buttermilk: Buttermilk not only enhances the cake’s flavor but also contributes to its moistness and tenderness.
Vanilla Extract: A touch of vanilla extract elevates the overall flavor profile of the cake, providing a subtle yet delightful aroma.
Baking Powder: This leavening agent helps the cake rise, resulting in a light and fluffy texture.
Salt: A pinch of salt is added to balance the sweetness and enhance the flavors.
Baking Techniques for Perfect Results To achieve the best results when baking Kentucky Butter Cake, it’s essential to follow certain techniques that bring out the cake’s full potential. Here are some tips to ensure your cake turns out perfect every time:
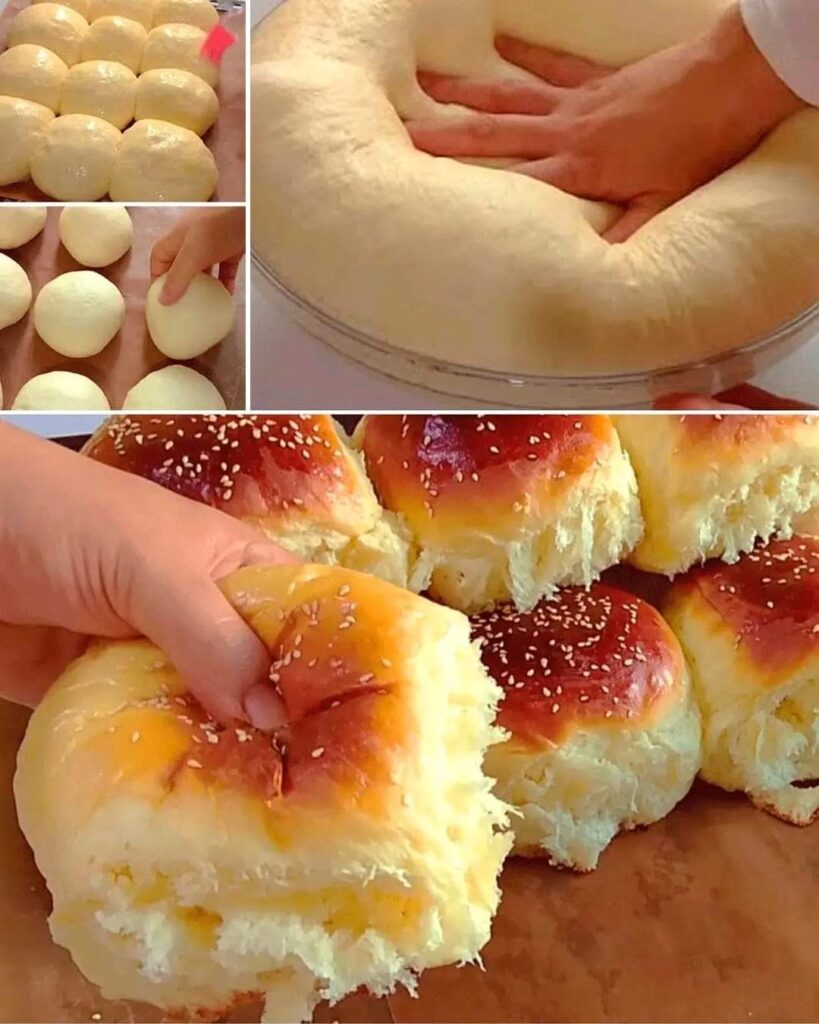
Prepare the Bundt Pan: Grease the Bundt pan generously with butter and dust it with flour, ensuring every nook and cranny is coated. This step ensures that the cake comes out of the pan easily after baking.
Creaming Method: Start by creaming the butter and sugar together until light and fluffy. This step creates air pockets in the batter, resulting in a tender and moist cake.
Slow Incorporation: Gradually add the dry ingredients and buttermilk to the creamed butter mixture, alternating between the two. This slow incorporation prevents overmixing, which could lead to a dense cake.
Patience is Key: After baking the cake, resist the temptation to remove it from the pan immediately. Allow it to cool for about 10-15 minutes before carefully inverting it onto a wire rack. This step ensures that the cake retains its shape and doesn’t break apart.
Variations to Savor While the classic Kentucky Butter Cake is undeniably delicious, there are several variations that add exciting twists to this beloved dessert. Here are a few mouthwatering variations to savor:
Lemon Kentucky Butter Cake: Add a refreshing burst of citrus by incorporating lemon zest and lemon juice into the batter. Top it off with a tangy lemon glaze for an irresistible treat.
Chocolate Kentucky Butter Cake: Chocolate lovers rejoice! Infuse the cake with rich cocoa powder and drizzle it with a decadent chocolate ganache for an indulgent twist on the original recipe.
Pumpkin Spice Kentucky Butter Cake: Embrace the flavors of fall by adding pumpkin puree and warm spices like cinnamon, nutmeg, and cloves to the batter. A dollop of whipped cream completes this seasonal delight.
In conclusion, Kentucky Butter Cake is a dessert that brings together the perfect combination of rich flavors, moist texture, and indulgence. Its origins in the Southern culinary traditions and the use of quality ingredients make it a true delight for anyone with a sweet tooth. Whether you savor the classic version or explore the various tantalizing variations, Kentucky Butter Cake is sure to please even the most discerning dessert connoisseur. So, roll up your sleeves, preheat your oven, and embark on a culinary adventure as you bake your very own Kentucky Butter Cake.
HOW TO MAKE ITALIAN CREAM STUFFED CANNONCINI? With its wide range of pasta and pizza meals as well as seasonal vegetables, meat, and fresh seafood, we all agree that Italian cuisine is one of the most fascinating in the world. There is also a large selection of sweet desserts so that even if you skip one, the meal isn’t complete. Whatever the season, everyone enjoys a delicious tiramisu, a creamy panna cotta garnished with fresh fruits, or a great large scoop of gelato, whether it’s summer or winter. Then there are the “pasticcini,” which are little bite-size sweets like Italian cream puffs, tartlets, and so on. The “cannoncino,” which is a sweet delicacy in this category and a particular favorite of mine, is one such sweet delight.
This traditional Piedmontese dessert, which is also very popular in many Northern and Central Italian areas, is filled with cream and baked. It is possible to get Cannoncini filled with various pastry creams while visiting an Italian pastry store, but the most popular filling is without a doubt the Vanilla Pastry Cream, which can be found in most pastry shops across the country. The recipe for the delectable Cannoncini is provided below! A few hours before serving, or at the very least a few hours before serving, the pastry horns are often filled with cream. Some cooks like to put a little dusting of powdered sugar on top of the Cannoncini before serving.
INGREDIENTS NEEDED:
CANNONCINI INGREDIENTS:
A sheet pastry dough; measure 9X9-inches square.
12 Cannoncini molds.
200 grams.Of caster sugar.
An egg.
PASTRY CREAM INGREDIENTS:
4 large egg yolks
200 ml.Of whole milk.
45 ml.Of heavy cream.
70 grams.Of caster sugar.
25 grams.Of cornstarch.
Lemon Zest, I used a quarter lemon.
vanilla extract; half a small spoon.
DIRECTIONS:
THIS IS HOW TO MAKE THE ICE CREAM WITH PASTRY:
Step 1:
Pour the milk into a large saucepan along with the heavy cream, the lemon peels, and the vanilla essence and bring to a simmer.
Step 2:
Preheat the pot over medium heat until the liquid reaches a temperature of 165 to 170 degrees Fahrenheit, then turn off the heat and cover with a lid.
Step 3:
Then, beat the yolks and sugar together until light yellow and fluffy, then gradually add the cornstarch, a tablespoon at a time, whisking constantly until the mixture is thoroughly combined.
Step 4:
The hot milk and cream infusion (without the lemon peels) should be added at this stage and whisked until well incorporated.
Step 5:
Finally, pour the mixture back into the saucepan and cook it over medium heat, stirring constantly, until it becomes thick, for about 5 minutes.
Step 6:
Fill a bowl with the pastry cream and cover with plastic wrap until it reaches room temperature, then keep in the refrigerator for up to 48 hours before serving.
AND TO MAKE THE SHELLS OF CANNONCINI, FOLLOW THESE TWO AESY STEPS:
Step 1:
If you’re using pastry dough sheets, the most important thing to remember is to keep them cool; otherwise, the dough will start to lose its consistency.
Step 2:
So work fast and keep the pastry in the freezer for no more than 3 minutes (no more than that) if it becomes necessary later on.
Try this Italian recipe as soon as you can, and please don’t forget to leave your feedback about it below, this action helps us to improve our cooking skills, and of course, reading your comments makes us very happy!!!
Baking soda has long been used to repel insects but only in recent years is it making a comeback. The need for everyone to find safe and effective ways to fight insects has sent people looking for more natural methods.
Baking soda is high on that list simply because it is safe for pets and humans for the most part. Insects, however, are a different story…they hate the stuff. There are many types of insects that baking soda works on. Here’s how to use baking soda to keep insects at bay.
1. Understanding the Basics
Baking soda’s granular nature makes it abrasive. When certain pests crawl over it, the substance can damage their exoskeletons, ultimately leading to dehydration and death. Moreover, baking soda disrupts the natural pH levels of some insects, making it lethal for them.
2. Targeting Ants with Baking Soda
Ants are attracted to sweet substances, making them easy targets for a baking soda mixture.
Method:
Mix equal parts of baking soda and powdered sugar.
Sprinkle the mixture in areas where ants are commonly found, like near entry points or their established trails.
Ants will be drawn to the sugar but will carry the lethal baking soda back to their colony, helping to eradicate the problem at its source.
3. Fighting off Cockroaches with Baking Soda
Cockroaches are notorious for being hard to eliminate, but baking soda offers a simple solution.
Method:
Combine equal parts of baking soda and sugar.
Place the mixture in small dishes or lids.
Set these dishes in areas where roaches frequent.
The sugar attracts them, and the baking soda will take care of the rest.
4. Addressing Silverfish
Silverfish love damp and dark places. Using baking soda helps curb their infestation.
Method:
Simply sprinkle baking soda in areas like bathroom corners, under sinks, and other places where silverfish might lurk.
The abrasive nature of the baking soda damages their skin and deters them from returning.
5. Tips for Effective Usage:
Always ensure that the baking soda is dry when using it as an insect deterrent. Wet baking soda might not be as effective.
Replace the baking soda mixture every few days for maximum effectiveness.
If using in areas accessible to pets, be cautious. While baking soda is generally safe, consuming large quantities might not be good for them.
6. Conclusion
Baking soda is a natural, affordable, and effective method to combat certain household pests. Its non-toxic nature makes it especially appealing for homes with kids and pets. However, for more severe infestations or for pests not mentioned here, it might be essential to consult with a pest control professional. Remember, prevention is always the best method. Keeping your home clean and free of food debris goes a long way in preventing pests in the first place.
Disclaimer: This article is meant for informational purposes and does not replace professional advice. Always test methods in a small area before full application.
Who doesn’t like a good plate of crispy fries? It definitely remains one of everyone’s favorite dishes. Alone or as an accompaniment to meat, these potato sticks are part of our culinary habits.
Only problem: you have to use a lot of oil to prepare them. What if we told you that it is possible to make them without even frying them? No more greasy french fries and excess fat harmful to health. How else to cook this dish to make it healthier? Now we show you an amazing recipe for french fries without the slightest drop of oil.
– Beat the egg whites and mix them with the spices mentioned above (and others that you particularly like). In particular, you can add rosemary or special fried spices that you will find in any supermarket.
– Then put the cut potatoes in a salad bowl and pour the whipped egg whites. Mix everything well with your hands.
– Remove the pan from the oven, line it with baking paper or parchment. – Place your potato chip sticks on top. For the little trick: space them out so they don’t stick together.
– Put the tray back into the preheated oven at 220°C. After 10 minutes check the cooking. Make sure you flip them so they cook on the other side as well. After another 10-12 minutes, your fries are ready.
NB : another version consists in boiling them very lightly before putting them in the oven. Again, you need to repeat the above process with the egg whites and spices.
That’s it, now you have a perfect method for making fluffy, golden brown fries without having to drain the cooking oil!
Foot care is essential for everyone, regardless of age. Hydration, exfoliation, and pedicure treatments are vital for maintaining beautiful feet, but they can be costly. Here’s a cost-effective, homemade recipe to pamper your feet, addressing common issues like dehydration, cracking, and hardening of the skin.
Causes of Foot Skin Problems:
Dehydration:
The main cause of cracked heels. Lack of hydration leads to dry skin and thickening as a protective response. Without prompt care, cracks can worsen, becoming painful and itchy. Nutritional Deficiencies: Deficiencies in vitamins and minerals, like iron, or conditions like diabetes and hypothyroidism, can lead to dry skin.
Environmental Factors:
Walking barefoot, wearing uncomfortable shoes, or using harsh soaps can impact foot health.
Prolonged Standing:
This can cause the skin on the feet to harden, leading to cracked heels.
Aging:
As skin ages, it loses elasticity, becoming thick, dry, and more prone to cracking.
Obesity:
Excess weight puts pressure on the heel, potentially leading to cracks if the skin is inflexible.
Symptoms:
Initial symptoms include rough, irregular, dry, and sensitive skin on the heel. As the condition worsens, cracks appear, taking on various colors and leaving the skin vulnerable to infections.
Homemade Foot Care Recipe:
Ingredients:
4 cups of milk
3 tablespoons of baking soda
Instructions:
Warm the milk and pour it into a basin.
Add baking soda and mix well, ensuring a comfortable temperature.
Soak your feet for 10 minutes, then rinse with lukewarm water and dry.
Repeat this treatment weekly.
Benefits of Ingredients:
Milk:
A natural nourisher and protector, milk moisturizes and softens the skin. It’s increasingly used in cosmetics for its anti-aging properties.
Baking Soda:
It balances skin pH, has antiseptic and anti-inflammatory properties, limits sebum secretion, and is an effective exfoliant. It also combats odors and aids in healing infections or other foot conditions.
This simple, natural remedy can save you money on pedicure sessions while effectively nourishing and moisturizing your feet, keeping them in excellent condition.
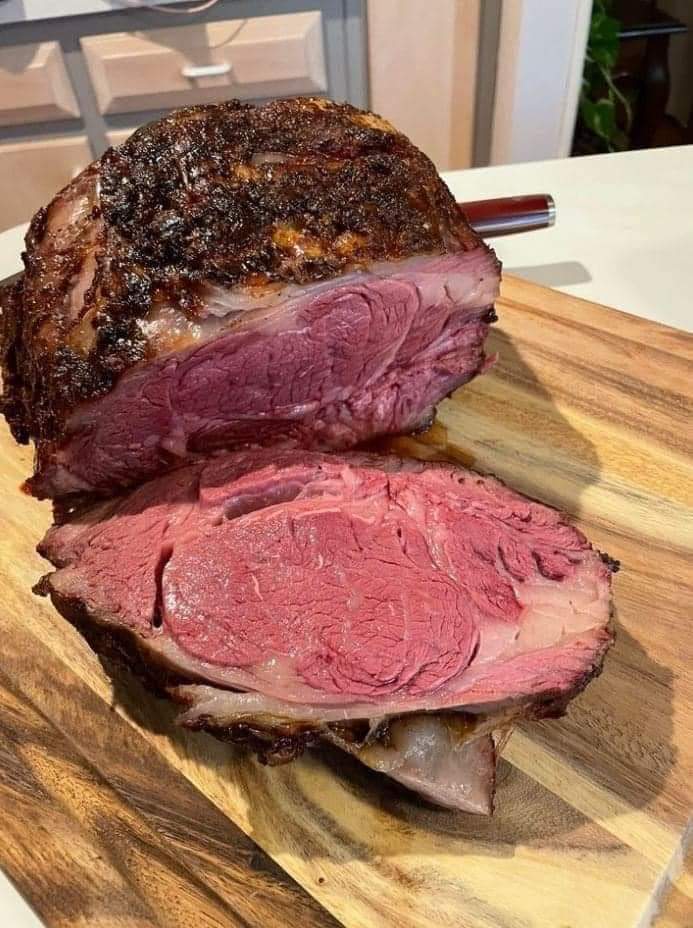
When it comes to a sumptuous and savory meal, prime rib takes the crown. This cut of beef is known for its tenderness, juiciness, and rich flavor. If you want to impress your guests or simply treat yourself to a special meal, mastering the art of cooking prime rib is a must. In this comprehensive guide, we’ll walk you through the process, from selecting the perfect prime rib to serving it like a pro.
Selecting the Right Prime Rib
Choosing the Cut
Selecting the right prime rib is the first step to culinary success. Look for a bone-in prime rib roast weighing between 6-8 pounds. The bone enhances the flavor and juiciness of the meat.
Seasoning and Preparation
Before you start cooking, season the prime rib with 2 tablespoons of olive oil, salt, and pepper. For an extra burst of flavor, consider inserting optional garlic cloves into the roast using a paring knife.
Cooking the Perfect Prime Rib
Initial Roasting
Preheat your oven to a scorching 500°F (260°C).
Place the prime rib roast on a rack in a roasting pan.
Rub the roast with olive oil and generously season it with salt and pepper.
If desired, you can insert garlic cloves into the roast using a paring knife for a delightful infusion of flavor.
Roasting to Perfection
Place the roasting pan in the oven and roast the prime rib at 500°F for 15 minutes. This high-temperature initial roast will seal in the juices and create a flavorful crust on the outside.
Reduce the oven temperature to 325°F (160°C) and continue roasting the prime rib until it reaches your desired level of doneness. Use a meat thermometer to check the internal temperature for precision. For medium-rare, aim for 135°F (57°C). Medium enthusiasts should target 140°F (60°C), while those who prefer well-done should go for 150°F (66°C).
Remove the roast from the oven and allow it to rest for 15-20 minutes before slicing and serving. Resting is crucial to retain the juices and ensure a succulent prime rib.
Are you looking for a super easy and budget-friendly meal that can feed a crowd? Look no further! Our Kielbasa Hashbrown Casserole is a real winner. This dump meal is not only incredibly tasty but also easy on the wallet, costing about $10 or less. Let’s dive into this scrumptious recipe.
Ingredients:
To get started, gather the following ingredients:
INGREDIENTS
QUANTITY
Frozen Hashbrowns
1 32 oz bag
Kielbasa (diced)
1
Small Onion (diced)
1
Cheddar Cheese
2 cups
Sour Cream
1/2 cup
Milk
1/2 cup
Cream of Mushroom or Chicken Soup
1 10 oz can
Instructions:
First, assemble your ingredients, including the hashbrowns, diced kielbasa, diced onion, and cheddar cheese.
Grease your slow cooker and layer the hashbrowns, diced kielbasa, onion, and cheese inside.
In a separate bowl, mix together the cream of mushroom or chicken soup, milk, and sour cream. You can also add seasonings like salt, pepper, minced garlic, and onion powder to taste.
Pour the creamy mixture evenly over the ingredients in the slow cooker.
To add an extra layer of cheesy goodness, sprinkle about 1/2 cup more of cheddar cheese on top.
Now, it’s time to let the slow cooker do its magic. Cook on low for approximately 6 hours or on high for about 3-4 hours. The result will be a bubbling, cheesy, and perfectly cooked casserole.