Category Archives: Recipes

Christmas Punch

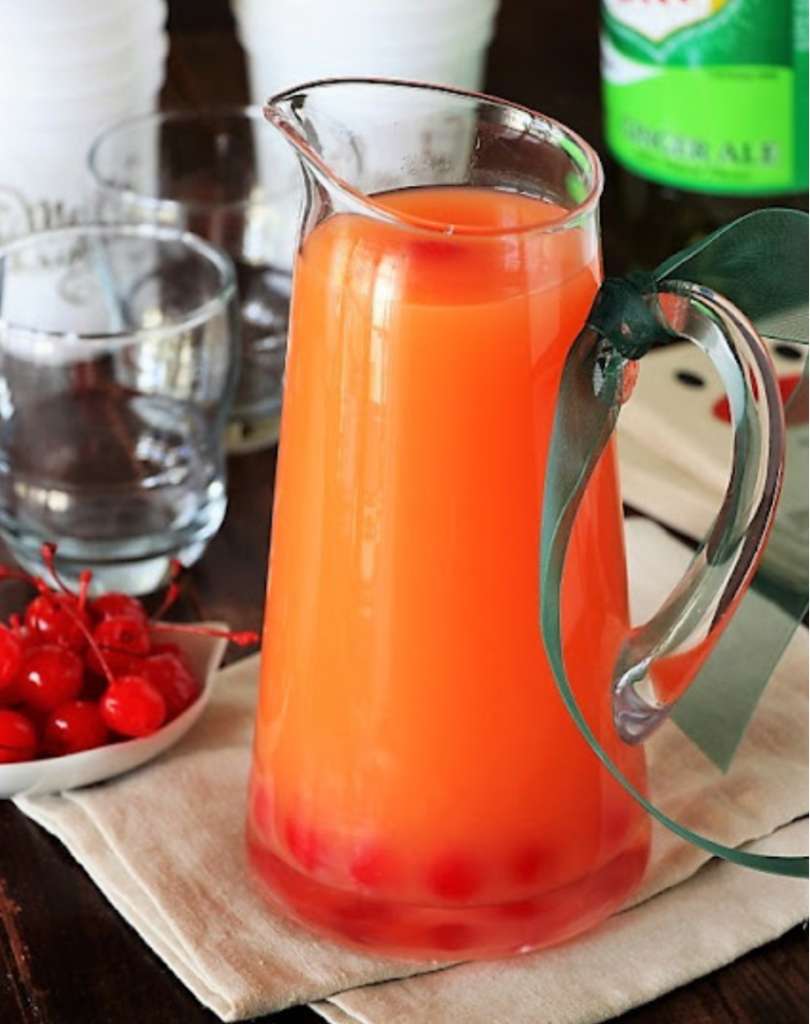
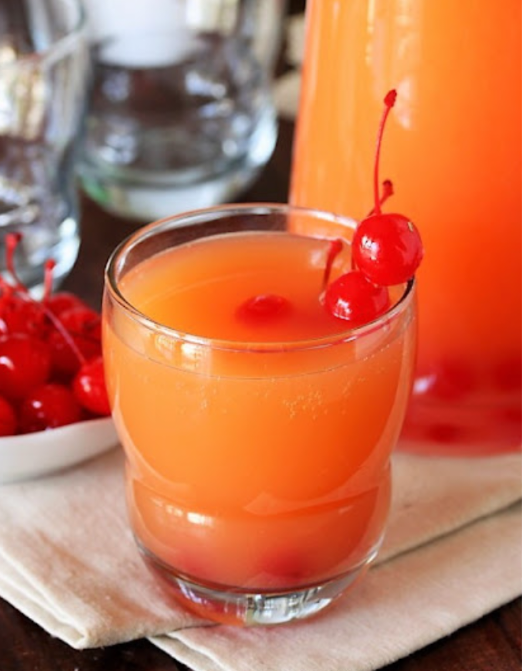
So whether you’re preparing for a large Christmas party, or for a smaller gathering of family or friends, a batch of Grandma’s Christmas Punch is a wonderful addition to the festivities.

I know for sure we’ll be enjoying a batch on Christmas day along with Grandma’s Christmas day cookie tray.  It’s a family tradition that continues to bring on the smiles.

INGREDIENTS:

  • 1 c. granulated sugar
  • 1 ½ c. water
  • 4 c. orange juice
  • 1 (46 oz.) canpineapple juice
  • 1 (10 oz.) jar maraschino cherries & the juice
  • 2 liter bottle gingerale

INSTRUCTIONS:

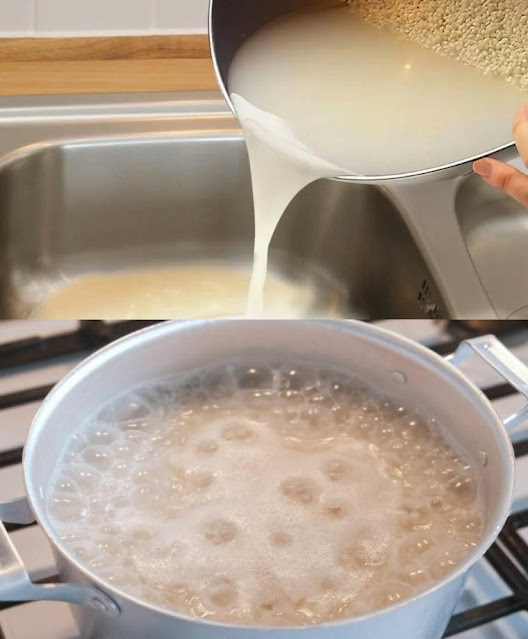
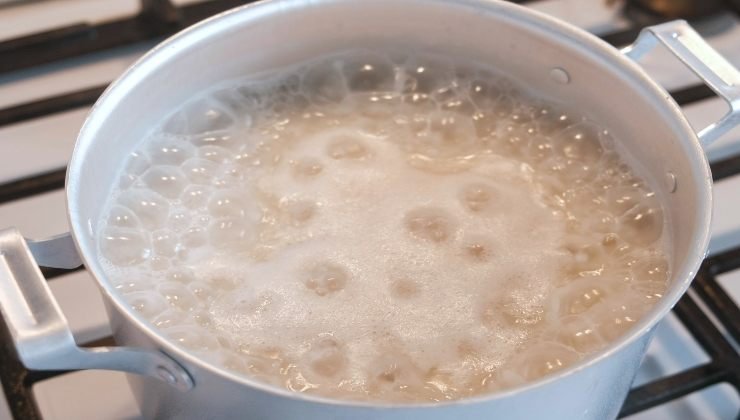
  1. Place sugar and water in a saucepan. Bring to a boil, stirring very frequently, to dissolve sugar. Set this sugar syrup aside to cool.
  2. In a large pitcher or other container, combine cooled sugar syrup, orange juice, pineapple juice, cherries, and the cherry juice. Stir until well mixed. Refrigerate until ready to serve.
  3. When ready to serve, add gingerale to the juice mixture to taste. {I mix it at a ratio of about 2/3 juice mixture to 1/3 gingerale. Grandma usually mixes it about ½ juice mixture and ½ gingerale.}

TRACEY’S NOTES

  1. Punch can be served in a punch bowl or in individual servings. If using a punch bowl, stir the juice mixture and gingerale together in the punch bowl right before serving. For individual servings, fill each glass about 1/2 to 2/3 full with juice mixture and then fill the remainder of the glass with gingerale.
  2. I like to make sure each serving gets at least one cherry!
  3. Grandma says this recipe serves about 20 people. Of course, that depends on how much each person drinks.

Credit: thekitchensimyplayground

One-Pot Mac and Cheese

Ingredients:

Cooking oil spray
2 cups skim milk
1 (12 oz.) can evaporated milk
1 egg
1 tsp salt
1/4 tsp. pepper
1 1/2 cups pre-shredded sharp cheddar cheese
2 cups uncooked elbow macaroni


Directions:

Spray the pot of the slow cooker or if using a liner bag, spray the bag well. In a mixing bowl whisk together milk, evaporated milk, egg, salt and pepper. Pour milk mixture into the crock pot. Add cheese and uncooked macaroni. Stir gently to mix.
Turn slow cooker on low and cook 3-4 hours, or until the custard is set and the macaroni is tender. (Do not cook more than 4 hours, or the sides will begin to dry out). Serve at once.
Jans tips: between the 3-4 hour mark on low, the edges start to get that crispy, cheesy edge. My kids love that part, but if yours don’t you’ll want to make this when you know you can cut it to warm or serve it at about the three hour mark.

Don’t pour rice cooking water down the sink: why you do it wrong

We should never throw rice cooking water down the sink. Here is the reason.

aqua di cottura

In our diets, we often find the consumption of rice, this cereal popular in the dishes of Asian people that has also permeated our cuisine, becoming one of the most consumed foods.

Just think about how one of the latest culinary trends, poké  , has rice as a basic food and how its consumption has increased in recent years precisely thanks to this new food.

Rice: This is why you shouldn’t throw rice cooking water down the sink

Rice is very important for nutrition, as it can be a substitute for pasta, especially for those who are gluten intolerant and, therefore, need to obtain energy from other foods.

It is usually combined with legumes or vegetables, but even eaten naturally it is usually preferred with a little olive oil and some salt. We have always associated it in our collective imagination with the Chinese, Japanese or Korean people.

This is because, in  anime  and  manga,  seen and read, they have always given us a representation of the  smile  as an element of coexistence and favorite food of this population.

Riso: ecco perché non bisogna gettare la water de sectura nel lavandino

Now, however, we Italians also use it abundantly and rice has become one of the main foods in some typical recipes, such as Sicilian arancini di riso.

But not everyone knows that, when we go to cook rice, we make a serious mistake by throwing the cooking water down the sink. And the reason has nothing to do with possible deterioration of the sink.

But the reason is precisely that rice  is rich in elements useful for other purposes, and the cooking water could be valuable in solving many problems, especially aesthetic ones.

The different uses

By letting it cool after cooking the cereal, it can be used on most parts of our body to prevent irritation and redness of the epidermis by having a calming effect on our skin.

It also promotes skin elasticity and can be used as a natural anti-wrinkle, combating skin dryness. Mixing it with coconut oil you obtain a natural cosmetic product.

Rice cooking water is also useful for our hair skin. Using it as a natural mask will make your hair soft and silky and nourished and hydrated to the right extent if you use it as a conditioner.

Riso: ecco perché non bisogna gettare la water de sectura nel lavandino

But in addition to our body, rice cooking water can become an excellent herbicide for our garden. Its properties will make all weeds disappear and the plants will absorb its characteristics.

So, when we eat some rice  and are about to drain the water, think about how useful it could be and how much money it could save us, and maybe avoid throwing it away.

In addition, with rice cooking water , you can also make delicious meals, you just have to browse the Internet a little and see what dish you can prepare with it and delight the palates of your family or friends.

Blackbottom Strawberry Banana Cream Pie

My husband and I had a Blackbottom Strawberry Banana Cream Pie for the first year when we were just married and have been making it ever since. It was one of the first recipes that we had at a restaurant that we agreed we needed to remake at home. I have been making it ever since for Summer get-togethers and sharing this easy recipe for years. So if you are a banana cream pie lover like my husband or a fruit lover like myself, you are bound to love this pie! My favorite part…yea I admit it’s the blackbottom (oreo) crust; it’s the perfect crust for a fruity pie!

Ingredients:

  • 1 large Cook and Serve Banana Pudding
  • Oreo Crust (pre-made) or homemade
  • 2 Bananas (sliced)
  • 3-4 cups of Strawberries (sliced or diced)
  • 1 small container of Cool Whip

Directions:

1. Cook up the banana pudding and refrigerate according the box directions.

2. Cut up the bananas and strawberries, sprinkle with lemon juice (to prevent browning), then refrigerate.

3. When the pudding it settled, stir the fresh fruit into the pudding and then pour into the pie crust.

4. Top the filling with a layer of Cool Whip and garnish with fresh fruit.

5. Refrigerate until time to eat. Enjoy!

Sharing is caring!

Banana, Honey and Water Blend: A Natural Remedy to Relieve Cough and Bronchitis

Ingredients:

1 ripe banana

1 tablespoon of natural honey

1/2 cup of lukewarm water

Preparation Steps:

Peel and slice the banana.

Place banana slices in a blender.

Add a tablespoon of honey.

Pour in the lukewarm water.

Blend until smooth.

Pour the mixture into a mug. For optimal benefits, consume this elixir once or twice daily, preferably in the morning and before bedtime, to help reduce cough and bronchitis symptoms.

Additional Tips:

Adjust the sweetness by varying the amount of honey.

Use a ripe banana for a smoother texture and gentler taste.

Although this remedy can provide relief, it’s important to consult a healthcare professional if symptoms persist or worsen. This natural remedy should complement, not replace, professional medical treatment.

Homemade Pepperoni Pizza

IngredientsContadina(R) Quick Pizza Sauce:

  • ½ (12 ounce) can CONTADINA® Tomato Paste
  • 1 teaspoon dried oregano, crushed
  • 1 teaspoon dried basil, crushed
  • ½ teaspoon garlic powder
  • ½ teaspoon onion powder
  • ½ teaspoon sugar
  • ½ teaspoon salt
  • ¼ teaspoon black pepper

Fleischmann’s® Easy Pizza Crust:

  • 3 ¼ cups all-purpose flour, or more as needed
  • 2 (.25 ounce) envelopes FLEISCHMANN’S® Pizza Crust Yeast or RapidRise® Yeast
  • 1 tablespoon sugar
  • 1 ½ teaspoons salt
  • 1 ⅓ cups very warm water (120 degrees F to 130 degrees F)
  • ⅓ cup oil

Toppings:

  • 1 (6 ounce) package HORMEL® Pepperoni
  • 1 cup shredded mozzarella cheese, or more to taste

DirectionsInstructions Checklist

  • Step 1For sauce: Combine all sauce ingredients with 1/2 cup water in a medium bowl; set aside for flavors to develop while making crust. Freeze remaining paste .
  • Step 2For crusts: Combine 2 cups of flour with the dry yeast, sugar and salt. Add the water and oil and mix until well blended (about 1 minute). Gradually add enough remaining flour slowly, until a soft, sticky dough ball is formed.
  • Step 3Knead for about 4 minutes, on a floured surface, until dough is smooth and elastic. Add more flour, if needed. (If using RapidRise® Yeast, let dough rest, covered, for 10 minutes.)
  • Step 4Divide dough in half. Pat each half (with floured hands) into a 12-inch greased pizza pan OR roll dough to fit pans.
  • Step 5For pizzas: Preheat oven to 425 degrees F. Top crusts with sauce, pepperoni and cheese.
  • Step 6Bake for 18 to 20 minutes until crusts are browned and cheese is bubbly. For best results, rotate pizza pans between top and bottom oven racks halfway through baking.

How to whiten your laundry and get rid of old yellow stains

Over time, our favorite white garments can lose their brightness, and unsightly yellow stains may appear, leaving us puzzled and frustrated. However, fear not! With a few simple tips and tricks, you can rejuvenate your laundry and bid farewell to those stubborn yellow marks. Let’s explore how to whiten your laundry and say goodbye to old stains.

Understanding Yellow Stains:

Yellow stains on white clothing are a common issue and can be caused by a variety of factors, including:

  1. Sweat and Body Oils: The natural oils produced by our bodies, combined with sweat, can contribute to yellowing over time.
  2. Deodorant and Antiperspirant: Residue from deodorant or antiperspirant can build up on clothing, leading to discoloration.
  3. Detergent Buildup: The use of too much detergent or inadequate rinsing can result in detergent residue, contributing to yellowing.
  4. Mineral Deposits: Hard water can leave mineral deposits on clothing, affecting their color.

Whitening Your Laundry:

1. Sort Your Laundry:

  • Before starting the whitening process, sort your laundry. Keep whites separate from colored items to prevent color bleeding.

2. Pre-Treat Yellow Stains:

  • For targeted stain removal, pre-treat yellow stains with a mixture of equal parts lemon juice and salt. Apply the mixture to the stain, let it sit for 15-30 minutes, and then launder as usual.

3. Baking Soda Boost:

  • Add 1/2 cup of baking soda to your laundry load along with your regular detergent. Baking soda is a natural brightening agent that helps lift stains and freshen fabrics.

4. White Vinegar Rinse:

  • During the rinse cycle, add 1/2 to 1 cup of white vinegar to the washing machine. White vinegar helps break down detergent residues and contributes to overall whiteness.

5. Oxygen Bleach (Optional):

  • If your whites need an extra boost, consider using oxygen bleach (not chlorine bleach) as directed on the product label. Oxygen bleach is gentler on fabrics than chlorine bleach.

6. Sunlight Exposure:

  • Take advantage of the natural bleaching properties of sunlight. Hang your whites to dry in direct sunlight, and the sun’s rays will help brighten and whiten your laundry.

Tips for Maintaining Whiteness:

  1. Avoid Overloading: Overloading the washing machine can prevent clothes from getting adequately clean. Ensure there’s enough space for water and detergent to circulate.
  2. Use the Right Detergent: Choose a detergent specifically designed for whites, and follow the recommended usage instructions.
  3. Regular Maintenance: Incorporate a regular laundry maintenance routine to prevent yellowing. Treat stains promptly, and don’t let them set in.
  4. Address Hard Water Issues: If you have hard water, consider using a water softener or adding vinegar to your laundry routine to combat mineral deposits.
  5. Check Care Labels: Always check the care labels on your clothing for specific washing instructions to preserve their quality.

Bid Adieu to Yellow Stains:

By following these simple steps and incorporating these tips into your laundry routine, you can revive the brilliance of your whites and say goodbye to those pesky yellow stains. A combination of natural brightening agents, targeted stain treatments, and proper care can make a significant difference in restoring the vibrancy of your wardrobe. Embrace the confidence of wearing crisp, white clothing that looks and feels like new!

BEST EVER MERINGUE & LEMON PIE

Ingredients :

  • 1-1/3 cups Gold Medal all-purpose flour
  • 1/2 teaspoon salt
  • 1/2 cup Land O’ Lakes butter, or vegetable shortening
  • 3 tablespoons cold water

Filling

  • 1-1/4 cups Domino sugar
  • 1/4 cup Argo cornstarch
  • 3 tablespoons Gold Medal all-purpose flour
  • 1/4 teaspoon salt
  • 1-1/2 cups water
  • 3 egg yolks, lightly beaten
  • 2 tablespoons Land O’ Lakes butter
  • 1-1/2 teaspoons grated lemon peel
  • 1/3 cup lemon juice

Meringue:

  • 1/2 cup Domino sugar, divided
  • 1 tablespoon Argo cornstarch
  • 1/2 cup cold water
  • 4 egg whites
  • 3/4 teaspoon vanilla extract

Directions:

Preheat oven to 425 degrees.

Combine flour and salt in a small bowl, then cut in shortening until crumbly. Gradually add 3 tablespoons cold water, tossing with a fork until dough forms a ball.

Roll out pastry to fit a 9″ pie plate. Transfer pastry to pie plate. Trim to 1/2″ beyond edge of plate; flute edges. Bake for 12-15 minutes or until lightly browned. Remove from oven, and lower the oven temperature to 350 degrees.

For filling, in a large saucepan, combine the sugar, cornstarch, flour and salt. Gradually stir in water until smooth. Cook and stir over medium-high heat until thickened and bubbly. Reduce heat; cook and stir 2 minutes longer.

Remove from the heat. Stir a small amount of hot filling into egg yolks; return all to the pan, stirring constantly. Bring to a gentle boil; cook and stir 2 minutes longer. Remove from the heat. Gently stir in butter and lemon peel. Gradually stir in lemon juice just until combined. Pour into the crust.

For meringue, in a saucepan, combine 2 tablespoons sugar and cornstarch. Gradually stir in cold water. Cook and stir over medium heat until mixture is clear. Transfer to a bowl; cool.
In a large bowl, beat egg whites and vanilla until soft peaks form. Gradually beat in the remaining sugar, 1 tablespoon at a time.

Beat in cornstarch mixture on high until stiff glossy peaks form and sugar is dissolved. Spread evenly over hot filling, sealing edges to crust.

Bake at 350° for 25 minutes or until the meringue is golden brown. Cool on a wire rack for 1 hour. Refrigerate for at least 3 hours before serving. Refrigerate leftovers.

Enjoy

The Best Beef Stew Ever

I remember when I was a kid, my mother used to make this beautiful beef stew during winter. I loved it so much. And now, with the winter coming, I remembered this recipe!

You’ll Need:

2 tbsps of olive oil.
2 pounds of cubed beef stew meat.
2 tbsps of all purpose flour.
4 cups of water.
2 cups of beef broth.
½ tsp of salt.
½ tsp of ground black pepper.
4 cups of cubed potatoes.
2 cups of chopped carrots.
1 tsp of dried rosemary.
1 cup of fresh corn kernels.
1 cup of fresh green beans cut into 1” pieces.
1 cup of chopped turnip (optional).
2 cups of chopped fresh tomatoes (optional).

How to:

In a large pot, heat the oil and stir in the beef and flour until browned.

Pour in the water and broth and season with salt and pepper. Bring to a boil, reduce the heat and simmer for 1 hour.

Mix in the potatoes, carrots and rosemary and simmer for 1 to 2 more hours.

Mix in the corn, green beans and simmer for 30 minutes and Voila!

Simple, easy and delicious!

This beef stew is super delicious. I love tomatoes, so I use them, and I advise you do the same if you are trying this recipe!

Enjoy

FRIED POTATOES AND ONIONS

This delicious Pan Fried Potatoes and onions Recipe is a way to up your game in the kitchen. Perfectly browned on the outside and tender on the inside, these potatoes and Onions will be a hit with your whole family. It is a versatile Side Dish for breakfast, brunch, or dinner. It is comfort food that goes with just about any main Dish.

Ingredients

  • 4 large Yukon Gold type potatoes.
  • 1 large onion, finely cut into rings.
  • 1 teaspoon of butter.
  • 1 teaspoon of olive oil.
  • ½ teaspoon of garlic powder.
  • 1 pinch of dill (or the herb / herb of your choice).
  • 1 pinch of salt and pepper

How To Make Fried Potatoes And Onion

  1. Start by peeling your potatoes. Cut them into thin slices.
  2. Do the same with your onion.
  3. In a large frying pan, and over medium heat, melt the butter and pour in the olive oil.
  4. Place the potato rings and onion rings in your pan.

It’s a perfect side dish with chicken, pork, or beef. 

Enjoy.