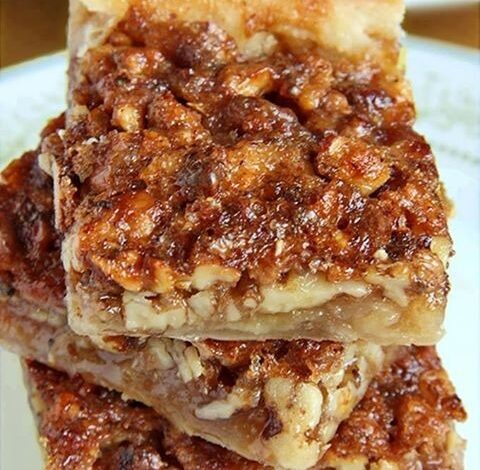
The secret lies in the simplicity of the recipe. With just a handful of readily available ingredients, you can whip up a batch of these pecan bars in no time. No complex techniques or hours in the kitchen—just pure, straightforward goodness.
Ingredients:
INGREDIENT
QUANTITY
Refrigerated crescent rolls (8 oz can)
1 can
Chopped pecans
3/4 cup
Sugar
1/2 cup
Corn syrup
1/2 cup
Butter or margarine, melted
2 tablespoons
Vanilla extract
1 teaspoon
Egg, beaten
1
Instructions:
Preheat the Oven:
Heat your oven to 350°F.
Prepare the Crescent Roll Base:
Unroll the crescent dough and press it into the bottom and 1/2 inch up the sides of a 9×13-inch pan.
Firmly press the perforations to seal the dough.
Bake for 8 minutes to partially set the crust.
Create the Pecan Filling:
In a medium bowl, mix together chopped pecans, sugar, corn syrup, melted butter, vanilla extract, and the beaten egg.
Assemble and Bake:
Pour the pecan filling over the partially baked crust, ensuring an even distribution.
Continue baking for an additional 18 to 22 minutes or until the bars turn golden brown.
Cool and Cut:
Allow the bars to cool completely, approximately 1 hour.
Once cooled, cut them into bars according to your preference.
Serve and Enjoy:
Plate your Easiest Pecan Bars and savor the delightful combination of flavors and textures.
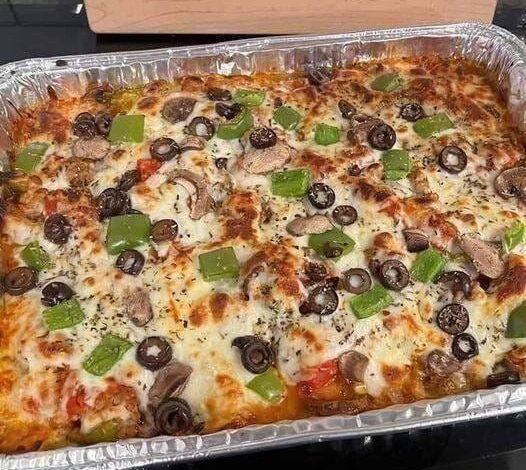
Are you craving pizza but want to skip the carbs? Look no further! Dive into the world of Crustless Pizza Bake, a mouthwatering alternative that satisfies your pizza cravings without the guilt. Let’s explore the recipe and the savory journey of crafting this delightful dish.
Pizza Sauce Ingredients:
INGREDIENTS
QUANTITY
Tomato Sauce
1 cup
Dried Oregano
1 teaspoon
Dried Basil
1 teaspoon
Garlic Powder
1/2 teaspoon
Salt
To taste
Black Pepper
To taste
Pizza Bake Ingredients:
INGREDIENTS
QUANTITY
Ground Beef (or alternatives)
1 pound
Onion
1 small, chopped
Red Bell Pepper
1/2, chopped
Green Bell Pepper
1/2, chopped
Shredded Mozzarella Cheese
1 1/2 cups
Sliced Black Olives
1/2 cup
Sliced Pepperoni
1/2 cup (low-carb brand)
Grated Parmesan Cheese
1/4 cup
Red Pepper Flakes (optional)
1/4 teaspoon (for heat)
Fresh Basil Leaves (optional)
For garnish
Instructions:
Preheat Your Oven:
Preheat your oven to 375°F (190°C).
Grease a 9×9-inch (23×23 cm) baking dish.
Prepare the Pizza Sauce:
Mix together tomato sauce, dried oregano, dried basil, garlic powder, salt, and black pepper in a small bowl.
Set aside.
Brown the Ground Beef:
In a large skillet over medium heat, cook the ground beef until browned.
Drain any excess fat.
Add Vegetables:
Add chopped onion, red bell pepper, and green bell pepper to the skillet with the browned beef.
Sauté for 3-4 minutes until the vegetables soften.
Layer the Bake:
Spread half of the prepared pizza sauce in the greased baking dish.
Place the beef and vegetable mixture on top.
Sprinkle half of the shredded mozzarella cheese, sliced black olives, and sliced pepperoni.
Pour the remaining pizza sauce over the top.
Add the remaining mozzarella cheese, sliced olives, and sliced pepperoni.
Finish with Parmesan:
Sprinkle grated Parmesan cheese over the top. Add red pepper flakes for heat if desired.
Bake:
Transfer the baking dish to the preheated oven.
Bake for 20-25 minutes or until the cheese is bubbly and slightly golden.
Garnish and Serve:
Remove the Crustless Pizza Bake from the oven.
Let it cool for a few minutes before slicing.
Garnish with fresh basil leaves for a burst of color and flavor.
Enjoy:
Serve your Crustless Pizza Bake hot and savor all the familiar pizza flavors without the carbs!
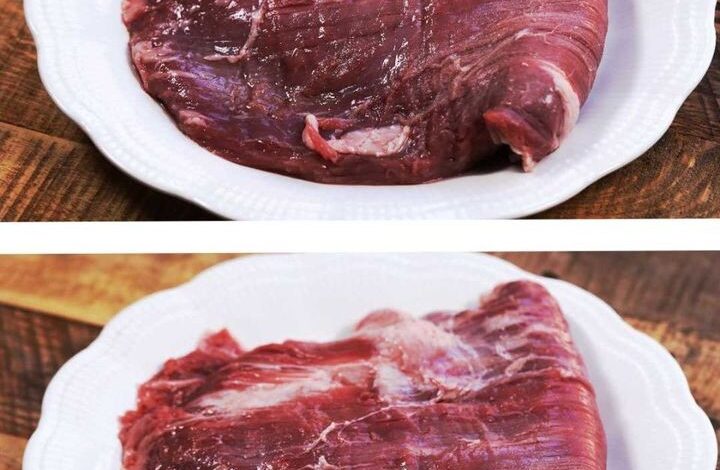
Embark on a culinary journey with Slow Cooker Chipotle Beef, a mouthwatering dish that combines the bold flavors of chipotle peppers, adobo sauce, and tender flank steak. This comprehensive guide outlines the process of creating this delectable dish, ensuring a flavorful and satisfying outcome.
Ingredients:
INGREDIENTS
3-pound flank steak, scored
1 teaspoon salt, plus more to taste
2 canned chipotle peppers, with 1 tablespoon of extra adobo sauce
1 cup beef broth
1 tablespoon cornstarch
Instructions:
Generously Season the Flank Steak: Begin by scoring the 3-pound flank steak and seasoning it with salt on both sides. This sets the foundation for a well-seasoned and succulent dish.
Infusing Flavor with Chipotle Peppers: Introduce the bold and smoky flavor by adding 2 canned chipotle peppers along with 1 tablespoon of extra adobo sauce to the slow cooker.
Enhancing Richness with Beef Broth: Pour in 1 cup of beef broth to elevate the richness of the sauce, creating a harmonious blend with the other ingredients.
Thickening the Sauce: Create a velvety texture by mixing 1 tablespoon of cornstarch with water and whisking it into the slow cooker. This step ensures a luscious and well-coated dish.
Slow Cooking Process
Cover the slow cooker and set it on low for 7 hours or high for 4 hours. Allow the flavors to meld and intensify as the dish simmers to perfection.
Remove and Shred the Flank Steak: Gently take out the flank steak from the cooker, shredding it into succulent pieces. This step prepares the dish for its final transformation.
Combining Meat and Sauce: Return the shredded pieces to the slow cooker, ensuring each morsel is coated in the flavorful sauce. Mix thoroughly to achieve a harmonious combination.
Adjusting Seasoning: Taste the Slow Cooker Chipotle Beef and make adjustments to the salt if necessary. This final touch guarantees a perfectly balanced and delightful culinary experience.
French Onion Soup is a classic dish known for its rich, savory flavors and gooey cheese topping. This recipe will guide you through creating this comforting delight step by step. So, roll up your sleeves and let’s get cooking!Ingredients: Here are the ingredients you’ll need to make this French Onion Soup:
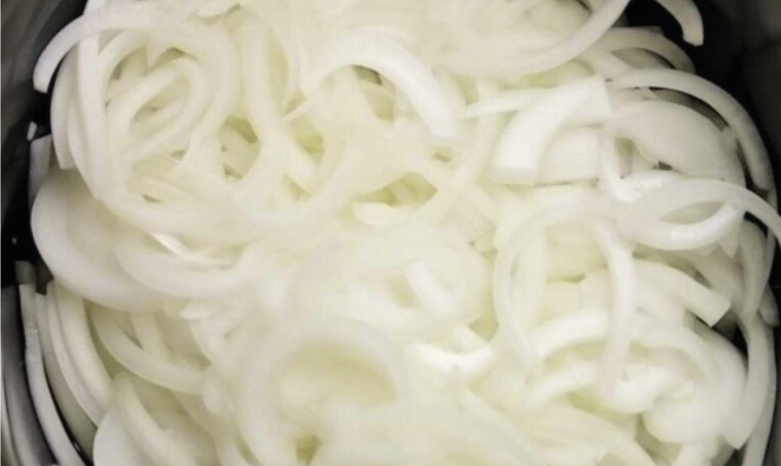
Ingredients: 3 pounds yellow onions, thinly sliced 2 tablespoons unsalted butter, melted 2 tablespoons olive oil ¼ cup balsamic vinegar 2 sprigs of fresh thyme 8 cups beef stock 1.5 cups shredded Gruyere cheese Salt and pepper, to your liking Optional: ⅓ cup of brandy To serve: Crunchy bread slices
Instructions: 1. Caramelizing the Onions Pour the onions into your slow cooker. Drizzle in butter, olive oil, and season with salt and pepper. Set to low and let it work its magic for 10-12 hours till the onions are golden. 2. Adding Flavor Stir in the beef stock, balsamic vinegar, and thyme leaves. Cook covered on low for another 6-8 hours. Season as needed, and feel free to add the brandy. 3. Preparing the Topping Get your oven ready at 350°F (180°C). Spoon the soup into oven-proof bowls and place them on a baking sheet. Crown each bowl with toasted bread and a sprinkle of Gruyere cheese. Bake for 20-30 minutes till cheese melts. For an extra golden touch, broil for 2-3 minutes. 4. Serve and Enjoy Once cooled a tad, dive into your comforting bowl of French Onion Soup! The beautiful union of caramelized onions, aromatic broth, and rich cheese guarantees a meal that hugs your soul and pleases your palate.
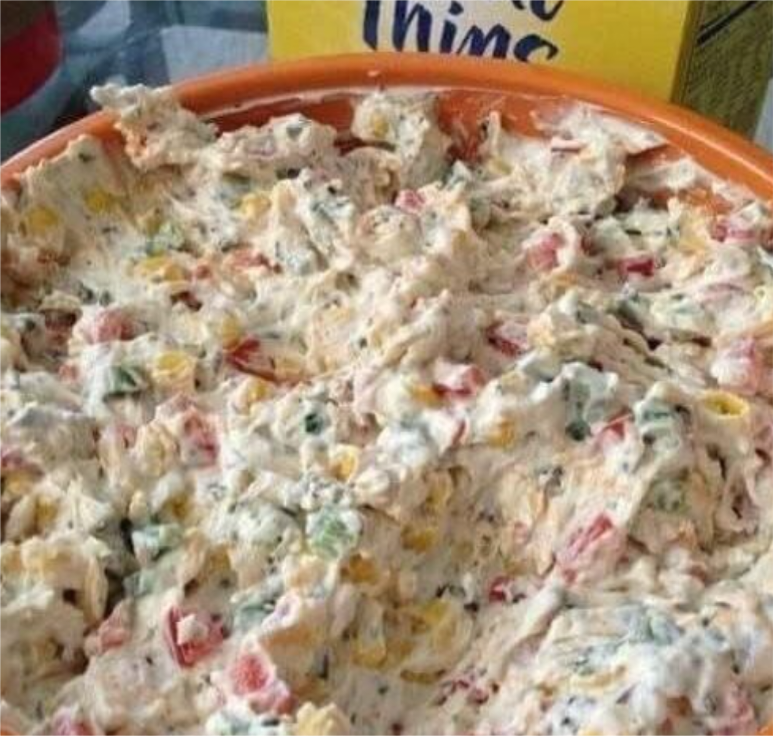
Imagine lounging by the pool, soaking up the sun, and indulging in a dip that’s creamy, sweet, and irresistibly delicious. The Skinny Poolside Dip brings you precisely that! This delightful dip combines the freshness of vegetables with the creaminess of Greek yogurt and cream cheese, all enhanced by the sweet burst of corn. In this article, we’ll share the tantalizing recipe with a table sheet format for the ingredients, so you can enjoy a guilt-free and satisfying snacking experience.Skinny Poolside Dip offers a fusion of flavors that will excite your taste buds. Follow this simple recipe to create a dip that will be the star of your next poolside gathering.
Ingredients: Greek yogurt 1 ½ cups Cucumber, finely diced 1 medium Tomatoes, finely diced 2 medium Red onion, finely diced ¼ cup Fresh dill, chopped 2 tbsp Fresh parsley, chopped 2 tbsp Lemon juice 1 tbsp Garlic powder ½ tsp Onion powder ½ tsp Salt ½ tsp Black pepper ¼ tsp Corn kernels (cooked) 1 cup Cream cheese (reduced-fat) 4 oz (½ cup)
Instructions: Prepare to elevate your snacking game with this creamy and sweet delight. Follow these steps to savor the Corn and Skinny Poolside Dip in all its glory.Prep the
Vegetables: Begin by finely dicing the cucumber, tomatoes, and red onion. Ensure they are evenly cut to provide a pleasing texture to the dip.
Prepare the Herbs: Finely chop the fresh dill and parsley. These herbs will add a burst of freshness to the dip.
Creamy Base: In a mixing bowl, combine the Greek yogurt, lemon juice, garlic powder, onion powder, salt, and black pepper. Mix thoroughly to create the creamy base for the dip.
Add Cream Cheese: Gently fold in the reduced-fat cream cheese into the yogurt mixture. The cream cheese will lend a velvety texture and a touch of sweetness to the dip.
Mix in Corn: Incorporate the cooked corn kernels into the creamy mixture. The sweet corn will add a delightful crunch and a burst of natural sweetness. Fold in Vegetables and Herbs: Add the finely diced cucumber, tomatoes, and red onion into the creamy mixture. Sprinkle in the fresh dill and parsley, ensuring all ingredients are evenly combined.
Chill and Marinate: Cover the bowl with plastic wrap and refrigerate the dip for at least 30 minutes. This allows the flavors to meld together, resulting in a more flavorful dip.
Serve and Enjoy: Once the dip has chilled and marinated, transfer it to a serving bowl. Pair it with your favorite chips, crackers, or a platter of fresh vegetable sticks. Now, savor the creamy goodness of the Corn and Cream Cheese Poolside Dip!
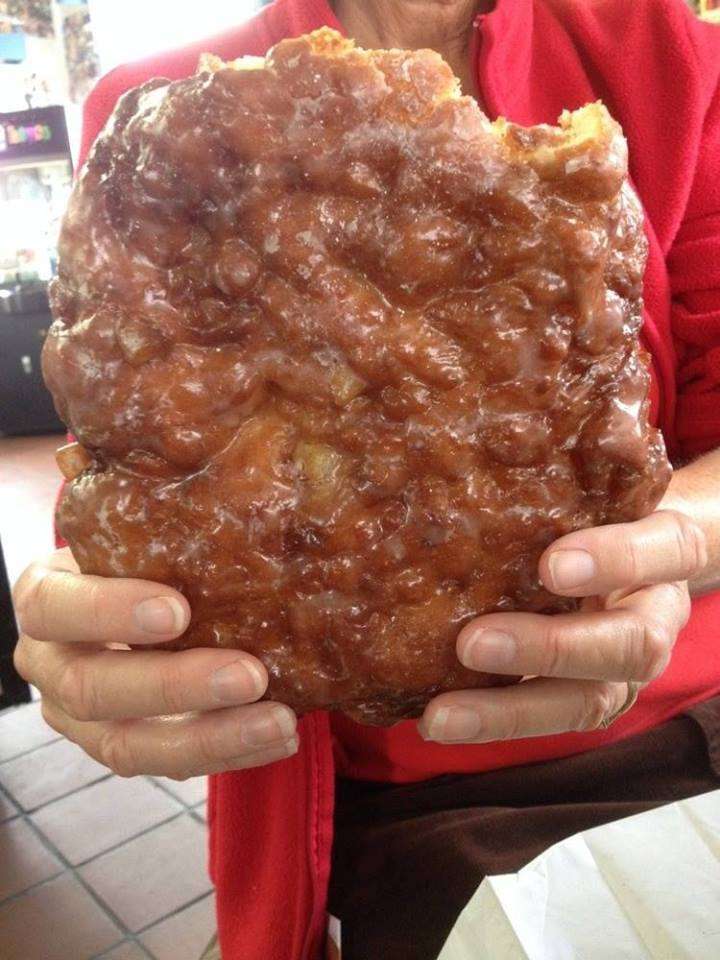
Apple bread is one of my favorite sweet breads in the whole wide world.
Yes, I am partial to banana and pumpkin loaves, too, but there is just something special about a sweet big apple bread that gets my heart pounding. Maybe it’s because it reminds me of the apple orchard I used to go to as a young girl. I always loved going to this place. The smells of the cider and cinnamon doughnuts cooking were heavenly. Do you have any childhood memories that are invoked by food?
Once I got older, married, and had a few little ones of my own, I would take my kids to the very same apple orchard.
My son, when he was about three, would swipe apples and take little bites out of it before I could stop him. Luckily, I knew the owner and she always laughed it off. I’d buy my apples and we would head on home to bake this bread. Sweet memories! I can’t believe how fast the years are flying by!
Ingredients 3 cups all-purpose flour 1½ cups sugar 3 teaspoons baking powder ½ teaspoon salt ¾ teaspoon Apple Pie Spice 2 large eggs 1 cup milk 1 teaspoon vanilla 2 Tablespoons butter, softened 1½ cups peeled, chopped apples Oil for frying Confectioners sugar
Directions Pour oil into a deep skillet or Dutch oven to a depth of about 3 inches. Heat to 375 degrees. Sift flour, sugar, salt, and Apple Pie Spice into a large mixing bowl. Place eggs in a separate bowl and beat them lightly. Stir in milk and vanilla. Make a well in the center of the dry ingredients and pour in the milk mixture. Add butter and beat with a mixer on low speed to moisten, about 1/2 minute. Scrape down sides of bowl and increase speed to medium for 2 minutes longer. Fold in apples. Using a 1/4 cup size measuring cup, drop into hot oil. Be careful not to splash the oil on yourself. If your pot is not very large at the top, you may be able to cook only one at a time.As the fritters cook, they will rise to the top. When browned on the first side, carefully turn them over with a spatula to brown the second side. Drain on paper towels and sprinkle immediately, and generously, with confectioner sugar or glaze I prefer glaze. To make glaze confectioners sugar and milk or water whisk together and glaze while warm.
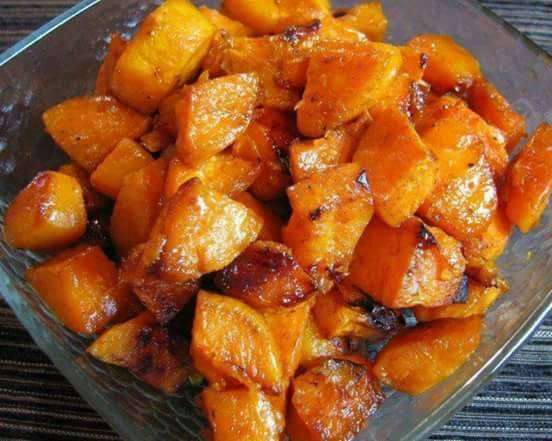
3 Sweet potatoes, peeled and cut into bite size cubes 2 tsp olive oil 1 tbsp butter 1 tbsp of brown sugar (more if you want it sweeter) 1 tsp of ground cinnamon 1/4 tsp of ground nutmeg Pinch of ground ginger Sea salt, to taste
DIRECTIONS:
Preheat the oven to 350 degrees. Coat a small baking dish with cooking spray. Peel and dice the sweet potatoes into bite size cubes and place in the baking dish. Melt butter in the microwave and pour over the potatoes along with the olive oil, brown sugar, cinnamon, nutmeg, ginger and salt. Add more sugar or cinnamon if desired. Toss to coat evenly. Bake in the oven for 60 minutes. Stir the sweet potatoes once or twice during roasting.
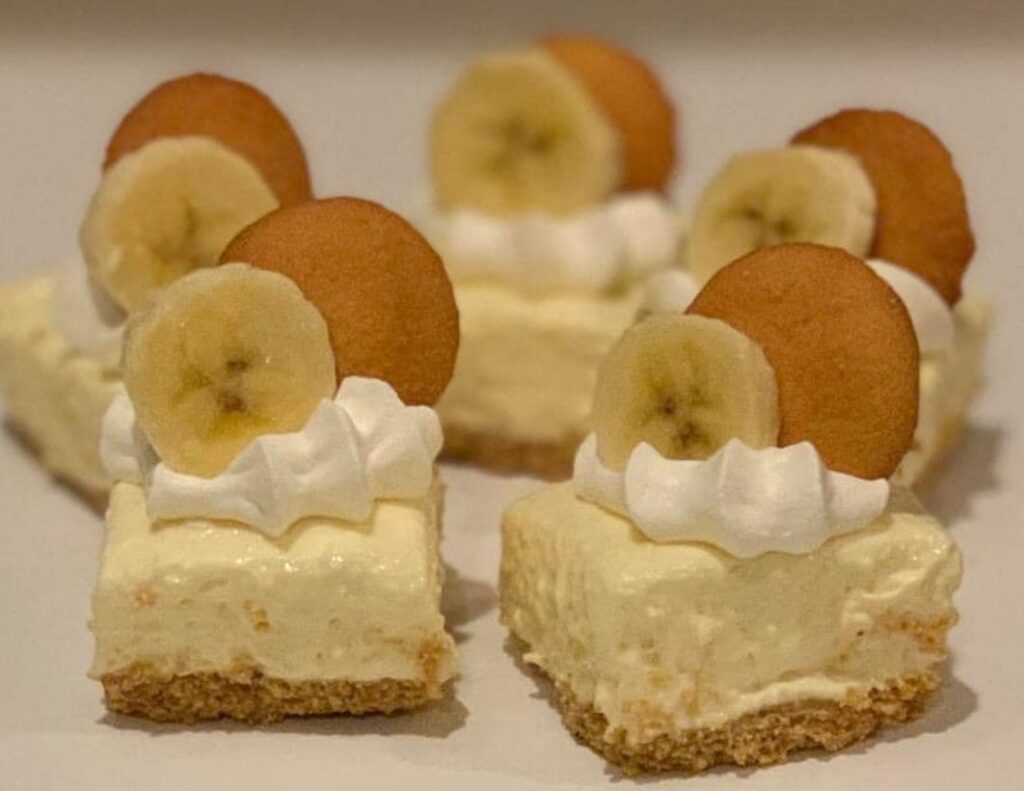
For the crust: 4 oz vanilla wafers 2 oz butter, melted
1. Using a food processor, pulse the cookies until they turn into a fine crumb. Add the butter and pulse until a dough is formed. 2. Spread the cookies in the bottom of a 8 inch springform pan. Refrigerate the crust while making the batter.
For the batter:
2 ripe bananas 17.5 oz cream cheese 1/2 cup sugar 4 eggs 1 tsp vanilla extract 2.5 oz vanilla wafers
Directions 1. Preheat the oven to 320ºF. 2. In the bowl of a stand mixer fitted with the whisk attachment, combine the cream cheese and the mashed bananas. Beat for 3 minutes. 3. Add in the sugar, beating for another 3 minutes. 4. Add the eggs one at a time, beating for one minute after each addition. Add in the vanilla extract. 5. Crumble the cookies with your hands and fold them into the batter. 6. Pour the batter into the prepared pan and bake for 45 to 50 minutes, until the cake appears set, with the center jiggling only a little. Let the cake cool in the turned-off oven.
For the topping: 1 banana 2.5 oz vanilla wafers 1 cup whipping cream 2 tbsp sugar vanilla wafers for garnish 1. Slice the banana and distribute it on one layer on top of the cooled cake. Place the cookies on top of the bananas. 2. Mix the cream and sugar until it forms stiff peaks. Spread it on top of the cake. 3. Top with additional crumbled cookies. Refrigerate overnight (or at least 6 hours) before cutting.
Okay, have you guys had a lush before? We’ve got a seriously yummy strawberry lush that always gets rave reviews, so it was only natural that we go for round two with a cherry version of our tried-and-true staple. The key to a lush is that you’ve got a crushed cookie base, a cream cheese filling layer, a cheesecake pudding layer, topped with a fruity topping of your choice – here, we went with cherry pie filling – and then you top it all off with frozen whipped topping or whipped cream. Put it in the fridge so it sets nice and firmly, then slice it up, serve it and enjoy!
What you will need: Graham Cracker Crust: 1 1/2 cups graham cracker crumbs 2 tablespoons granulated sugar 6 tablespoons unsalted butter, melted
For the Cheesecake Filling: One 8-ounce cream cheese, at room temperature 1/4 cup granulated sugar 1 teaspoon pure vanilla extract 1 cup heavy whipping cream
For the Topping: 1 – 21 ounce can cherry pie filling
How to Make It:
USE :
–For the Graham Cracker Crust:
-In a large bowl, mix together the graham cracker crumbs, sugar, and melted butter.
-Press onto the bottom and up the sides of a well greased 8-9 inch tart pan or spring form pan with removable bottom. Press the crumb mixture onto the bottom and about one inch (2.5 cm) up the sides of the pan.) Cover with plastic wrap and place in the refrigerator to chill while you make the filling.
For the Cheesecake Filling: -In the bowl of your electric mixer, or with a hand mixer, beat the cream cheese until smooth. Add the sugar and beat until light and fluffy. Scrape down the sides of the bowl and beat in the vanilla extract.
-In a clean bowl, beat the whipping cream until soft peaks form. (I always chill the bowl in the freezer before using) Gradually fold or beat the whipped cream into the cream cheese mixture. Pour the filling over the chilled graham cracker crust and smooth the top. Cover and place in the refrigerator for about an hour and then spread the cherry pie filling over the filling. Return to the refrigerator to chill for several hours, or even overnight.
Dogs that eat high quality and well dosed food are not only healthy, but also have more energy, a nicer coat and a higher willingness to learn. Unfortunately, many owners do not feed their dogs enough, either out of ignorance, savings or for reasons that are easiest for them to keep and serve. Everything you need to know about feeding healthy dogs can be found in this text, while we will look at medical dog food in one of the following articles.
Buyers of dog food have many questions, which we are always happy to answer, but often they fail to ask the right question, namely – What is the best dog food? The answer to this question is more complex than the answers to questions such as “How often should a dog be fed?” or “Is dry or wet food better? Natural nutrition as a goal
All pets must be fed in a manner that most closely resembles natural nutrition. The dog is the only large carnivore that has been domesticated, and during the 20,000 years of its existence as a special species in relation to the wolf, the dog has changed its diet to a semi carnivore. Dogs have a preference for meat and eat meat when available, but can also eat plant foods. So you will certainly not make a mistake if you feed the dog food of animal origin with the addition of plant food, because it is the basic “recipe” for dogs. Studies in which dogs were given a large amount of high quality natural food so that they could choose what they wanted to eat, showed that they eat a lot of meat in the first days, but very quickly switch to only about 30% protein, and the meat with nuts, cereals, fruits and other foods. It has been proven that dogs can be perfectly healthy even with vegetarian food, but then it is necessary to add vitamin D and pay attention to the protein content, while a diet that simulates a diet in nature is much easier.
Animal proteins are the basis of any dog food, whether fresh meat, heat-treated meat or dry, semi-dry and wet dog food. When preparing your own food, cooked or roasted meat is better than fresh meat because there is a constant risk of bacteria in fresh meat (bacteria from unprocessed meat is the most common source of stomach problems in dogs) and fresh meat has no advantage meat, although many proponents of “natural nutrition” argue.
A significant portion of Pet Spot’s line consists of dog foods created to mimic the diet of dogs in nature to the maximum extent possible. For example, each type of food in the Taste Of The Wild brand contains everything that would wild dog food in a selected ecological zone, such as in the plains, near watercourses or in the forest. Choosing this food is always a great thing and dogs especially like to eat it.
Pay attention to packaging: Proteins, fats and carbohydrates. We hear about fats, amino acids, carbohydrates, vitamins and minerals every day, but nutrition can often be complicated, so we quickly forget what we hear. Fortunately, when it comes to dog nutrition, we don’t have to worry much about vitamins and minerals, because healthy dogs don’t need more than what they eat (if the food is labeled as balanced and complete), so the most important thing is what kind of protein ), fats and carbohydrates dogs get, as well as in what proportion.
Protein
The role of protein in the diet is to provide important amino acids without which the body cannot survive. Per kilogram of body weight, a dog must receive at least 1.5 grams of protein per day to be healthy, and it is recommended to add two grams, so an adult dog weighing 20 kilograms needs at least 30, ideally 40 grams of protein per day.
For example, if a dog gets a can of food weighing 450 grams, which contains 8% protein, it means that the dog has 450 * 0.08 = 36 grams, which is enough for a dog weighing 18 kilograms.
Calorie requirements of dogs
See how many calories your dog likes and make sure you give him too many calories
However, not all proteins are the same. The best for the diet contain 10 basic amino acids in an ideal ratio, whereby the dog easily recognizes quality food and it happens that dogs even avoid proteins that lack only one amino acid (dogs choose food far more by smell than by taste, because they have 50 times more olfactory receptors than humans).
If the package states that the protein source is meat, such as beef or chicken, this is a sign that it is a high quality food mixed with meat or even after the meat has been removed. Ideally, as with human food, it will be indicated which part of the animal the meat comes from (e.g. chicken) and whether it is “pure” meat without bones or skin.