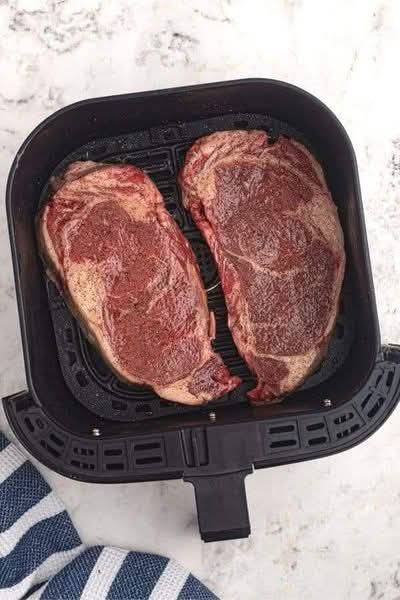
Introduction: Indulge in a culinary delight with our mouthwatering recipe for ribeye steak cooked to perfection in the air fryer. This dish combines the rich flavors of tender ribeye steak […]

An Amish buddy introduced me to this treat, and I couldn’t get enough!
This decadent pie is a perfect blend of rich peanut butter and smooth chocolate. The creamy filling is lightened up with whipped cream, while the chocolate ganache provides a decadent […]
Omg that was so delicious ! My family and I enjoyed this so much and will be making more
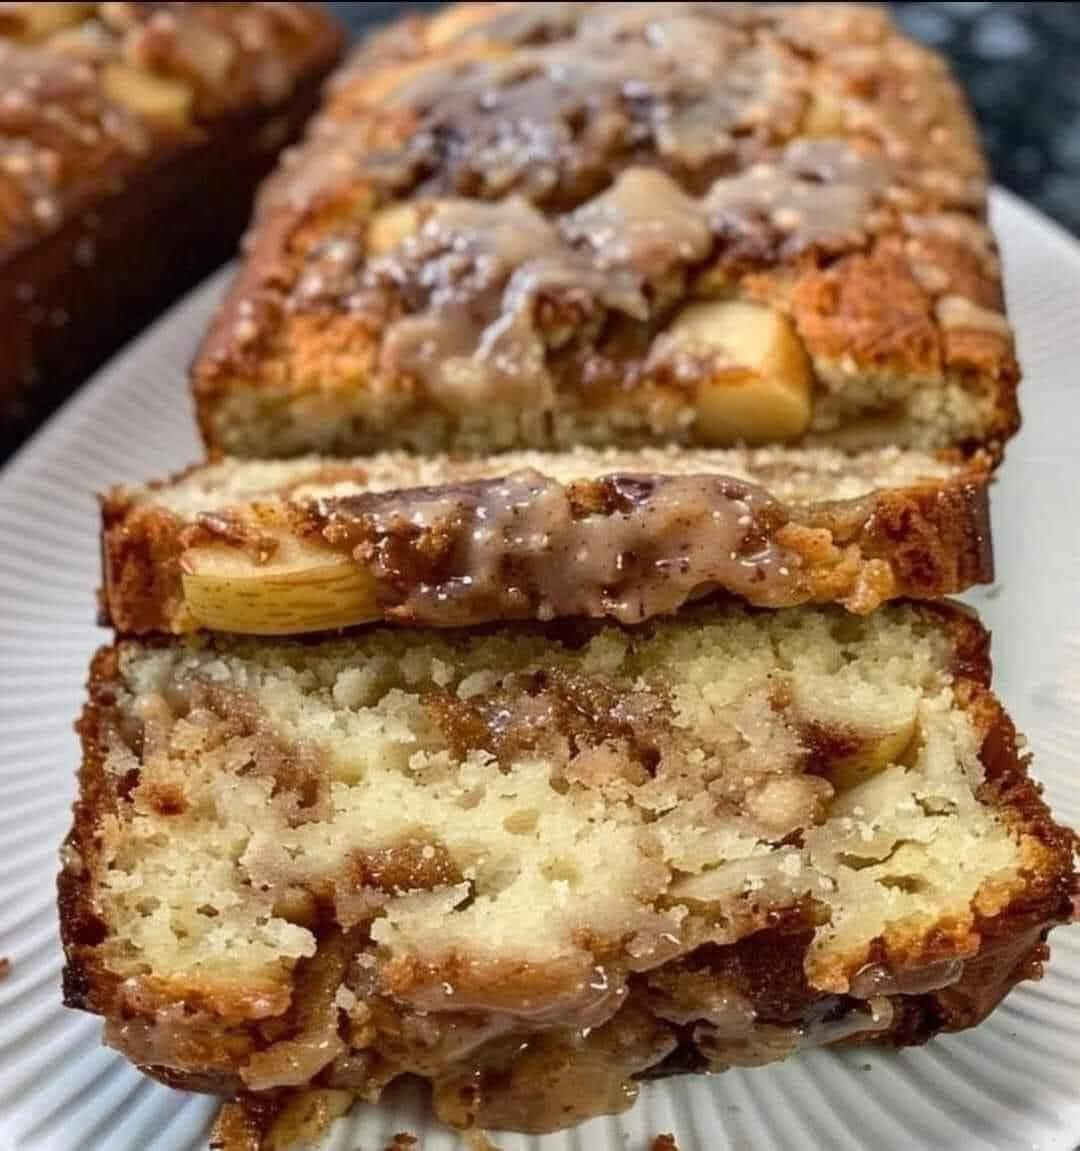
This recipe combines the comforting flavors of apple and cinnamon with a tender, moist cake base to create a delicious and easy-to-make loaf bread. The swirling technique adds visual appeal […]

Transform Your Bathroom: The Ultimate Guide to Cleaning Your Toilet with Baking Soda
Cleaning the toilet is a chore that few enjoy, yet it’s essential for maintaining a hygienic home. Over time, toilets can develop stubborn stains and unpleasant odors that standard cleaners […]

My whole family couldn’t get enough of this. Next time, I’m making double!
There’s something truly special about a pork tenderloin wrapped in crispy bacon and caramelized with a touch of brown sugar. This dish brings back fond memories of Sunday dinners and […]

Rod Stewart Describes His Voice Loss After A Terrifying Cancer Diagnosis
This year, Rod Stewart will bring his recognizable singing voice back out on the road to play songs from his new album, The Tears of Hercules, as well as fan […]

Creamed Potatoes and Peas Recipe
This classic side dish is a comforting blend of creamy sauce, tender potatoes, and sweet peas, topped with crispy bacon. Ingredients: Ingredient Quantity Red potatoes 2 lbs, boiled Butter ¼ […]

I Returned to a Smashed Bathroom Door—What I Discovered Led Me to File for Divorce
Returning home after a relaxing weekend should be a comforting experience. However, for one woman, it became the catalyst for uncovering a betrayal that would shatter her family. This is […]

Our House Was Egged on Christmas — I Was Flabbergasted When I Found Out Who Did It
When Ellie’s family returns from their Christmas getaway, they’re shocked to find their house egged and a cryptic note left behind. Determined to uncover the culprit, Ellie checks the security […]

Why Do Restaurants and Hotels Put Ice in Their Toilets? Unveiling the Chilling Truth
Ever walked into a restroom and wondered why there’s ice in the urinals or toilets? It’s not just a quirky practice; there’s a method to this chilly madness. The Cool […]