3 med. size croissants… 2 T. butter, melted 6 slices bacon, cooked and roughly chopped 5 large eggs 1/2 C. milk pinch of salt and pepper 4 oz. shredded sharp cheddar cheese dried chives or fresh if you happen to have them.
Lightly spray a 9×9 baking dish with cooking spray. Take each croissant and tear it into bite size pieces and place in the bottom of the pan. Drizzle the butter over the croissants. Top with 1/2 of the cheese then the chopped bacon. Whisk together the eggs, milk, salt and pepper. Pour over the casserole and using the back of a spoon mash around the top to make sure the croissants absorb some of the liquid. Top with the remaining cheese and sprinkle some chives over the top. Place in a 350 degree oven for 30 minutes. Serve immediately.
When my brother and I were young, we would pick wild blackberries for my grandmothers and my mom in hopes of our favorite dessert, blackberry dumplings. Back then, I hated picking the berries, but I loved the results.
These dumplings stay firm and dense without puffing up in the berry mix.
These days, I don’t mind picking a few gallons of fresh blackberries. It helps that all three of our kids love blackberry recipes as much as I did back then. A bowl of these blackberry dumplings with a scoop or two of vanilla ice cream, preferably homemade, instantly transports me back in time.
This dumpling recipe stays firm and holds its shape. Almost like a fat, sweet noodle. 1 quart fresh blackberries 2 cups white sugar, or to taste 2 cups water 2 tablespoons butter 1 teaspoon cinnamon 2 cups flour 1 teaspoon salt 1/4 cup shortening 1 egg yolk 5 tablespoons milk Place blackberries, sugar, water, butter, and cinnamon in a large saucepan. Cook and stir occasionally over medium heat until have started to break down and form a sauce, about 20 to 30 minutes.
Meanwhile, whisk together the flour and salt in a mixing bowl. Cut in the shortening with a knife or pastry blender until the mixture resembles coarse crumbs. Stir the egg yolk into the crumbs. Add the milk a tablespoon at a time, tossing with a fork, until the flour mixture is moistened. Do not add more milk than you need: when you squeeze a handful of the moistened pastry mixture, it should form a ball. Divide the dough in half and shape into small balls. Some people like flat dumplings so they to roll into a flat circle and cut into strips, then cut strips into squares.
Drop dumplings (balls or strips) into the berries. Simmer the dumplings, covered, over medium heat for 15 minutes. You may push the dumplings down into the juice but do not stir until they are fully cooked or they will clump together.
**I tried both the dumpling balls and the strips, and I prefer the strips best!! I rolled the dough out to about 1/4 inch thickness and just dropped them in. YUMMMMY!! Great with ice cream!
The combination of coffee and vinegar: This incredible discovery are making many households want to follow.
This unique blend is not just a kitchen experiment but a skincare sensation. Let’s dive into why this mix is becoming a must-try at home.
If you think of discarding coffee grounds, please consider their hidden potential. These remnants of your morning brew are more than just waste; they’re a treasure trove for natural skincare.
The Power Duo: Coffee and Apple Cider Vinegar
Coffee grounds alone have their merits, but the real magic happens when combined with apple cider vinegar. This duo creates a remarkable concoction for skin care, a natural alternative to expensive commercial products. Let’s explore how these two everyday items can transform your skincare routine.
Economical and Effective Skincare
Stop spending a fortune on skincare products because nature offers powerful ingredients. This DIY recipe featuring coffee grounds and apple cider vinegar is a testament to that. It’s a cost-effective solution for maintaining healthy, youthful skin.
The DIY Coffee-Vinegar Mask for Wrinkle Combat
We’re highlighting a specific recipe – a mask that leverages the potency of coffee grounds and vinegar to tackle wrinkles. Here’s how you can prepare this at home:
Ingredients:
Coffee grounds Apple cider vinegar Nutritional yeast flakes Optional: honey
Instructions:
In a bowl, combine a tablespoon of coffee grounds, half a tablespoon of apple cider vinegar, and half a teaspoon of nutritional yeast. Add a bit of honey if desired.
Mix the ingredients thoroughly.
Apply the mixture to your face or body, leaving it on for about 10 minutes.
Rinse off with water, pat your skin dry, and follow up with a moisturizer. Remember, gentle application is key.
Additional Use: Coffee as an Exfoliant
Coffee grounds can also be used as a gentle exfoliant. However, moderation is essential – once a week is sufficient to achieve softer, more radiant skin without over-exfoliating.
In short, the combination of coffee and vinegar offers a simple yet effective approach to skincare. This natural method not only saves money but also harnesses the intrinsic benefits of these common household items. Embrace this DIY skincare revolution and witness the transformation in your skin’s health and appearance.
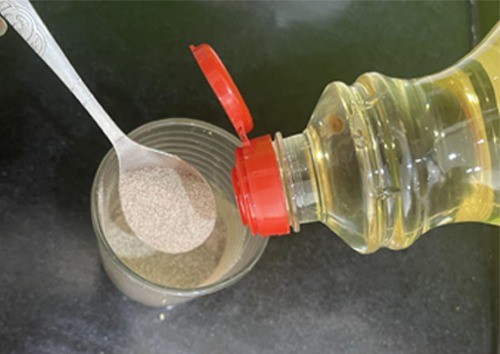
Here’s a foolproof method to clean a clogged sink. Let’s find out which products to use and the steps to follow to achieve an optimal result in a short time.
Clogged Sink: A Common Household Problem
It has happened to everyone at least once in their lifetime – the bathroom or kitchen sink gets clogged. The heavy use of these elements over time can lead to problems with the associated clogging of the drain.
Water starts accumulating in the sink and drains slowly. In more severe cases, the sink can be completely clogged. Improper use of the sink can lead to frequent clogs. It’s advisable to prevent hair or fur from entering the drain, as these elements can form deposits over time and clog the drain.
In general, it’s wise to be careful and avoid accidental entry of “foreign” elements into the drain. We’re also referring to food scraps, dust, and other residues. Dirt in the pipes can impair the smooth functioning of your sink, a situation to avoid.
Moreover, lime scale deposits are another cause of potential clogging. Therefore, it’s advisable to prevent this regularly using baking soda and vinegar. These elements dissolve the lime scale and prevent your sink from clogging.
In this article, however, we want to highlight an infallible method that will free clogged pipes in your sink in just a few seconds. Are you ready to learn about the products to use and the steps to follow? Just keep reading.
Freeing a Clogged Sink in a Few Simple Steps: The Infallible Method
If you have a clogged sink, the first thing to think about is calling a specialized technician. Quickly, they will understand the problem and make your sink look like new again. However, in many cases, the blockage can be easily resolved even by non-professionals.
Clogged Sink
If you don’t want to spend money on sink maintenance for a minor blockage, know that there are several simple natural methods to solve the problem yourself.
A special tool, like a drain cleaner, can be helpful to free the drain from blockages. It has a handle and a suction cup that allows you to eliminate blockages in less severe cases thanks to the vacuum effect. It just requires a bit of practice and strength.
However, there’s also a simpler and more effective natural solution. It involves using commonly available products that are very easy to find.
Are you tired of spending your precious morning hours in the kitchen, preparing breakfast? Well, we have a solution for you – a delicious and hassle-free breakfast casserole that cooks while you sleep! In this article, we’ll walk you through the easy recipe, ingredients, and expert tips for making the perfect breakfast casserole in your crock pot.
Ingredients:
Let’s start by gathering the essential ingredients for your breakfast casserole. These are the building blocks of a great morning meal:
INGREDIENTS
1 bag 26 oz. frozen hash browns
12 eggs
1 cup milk
1 tablespoon ground mustard
1 16 oz. roll sausage (maple, sage, or regular)
Salt and pepper
16 oz. bag shredded cheddar cheese
Instructions:
Creating a breakfast casserole that cooks itself is easier than you might think. Follow these simple steps to get your day off to a fantastic start:
1. Prep the Crock Pot
Spray your crock pot with a non-stick cooking spray, ensuring the bottom is well-coated.
ADVERTISEMENT
2. Crack and Whisk
In a large bowl, crack the 12 eggs and whisk them slowly to achieve a smooth consistency.
3. Add the Creaminess
Pour in a cup of milk, giving your casserole a delightful creaminess that will melt in your mouth.
4. The Secret Ingredient
Don’t be shy about it – add that tablespoon of ground mustard. It may sound unusual, but trust us, it’s a game-changer in flavor.
5. Season to Perfection
Sprinkle in salt and lots of fresh pepper, seasoning the mixture to perfection.
6. Sizzle the Sausage
Cook the sausage on high heat until it’s browned and perfectly cooked. Drain the excess grease and set it aside.
7. The Hash Brown Base
Spread the frozen hash browns evenly at the bottom of the crock pot, creating a hearty base for your casserole.
8. The Sausage Layer
Now, add the cooked sausage on top of the hash browns, forming the next layer of flavor.
9. Cheese Galore
Ask yourself, “Is this enough cheese?” Our answer: probably not! Go ahead and add the whole big bag, generously covering the sausage.
10. Mix It Up
Give it a good mix, ensuring an even distribution of all the delicious ingredients.
11. Pour the Egg Mixture
Pour the egg mixture over everything in the crock pot, using a wooden spoon to even it out so it’s spread evenly.
12. Set It and Forget It
Turn the crock pot on low for 6-8 hours, and let it work its magic while you sleep.
Vinegar, known for its versatility, has been used since 5000 BC as a cleaning agent and continues to be a valuable tool in modern homes. Its applications extend from culinary uses to household cleaning and even therapeutic properties. The Babylonians were the first to discover vinegar’s antibacterial qualities, using it as a food preservative. Today, we explore various ways you can use vinegar effectively in your daily life.
1. Removing Stickers:
Vinegar is an effective solution for removing stickers and adhesive residues, especially from car surfaces. Just spray some vinegar on the sticker, wait a few hours, and it will peel off effortlessly.
2. Preventing Cats from Scratching Furniture:
Cats often scratch furniture, but they dislike the smell of vinegar. Mix equal parts of vinegar and water to create a deterrent spray to keep them away from certain areas.
3. Natural Baby Wipes:
Create your own baby wipes using 250 ml of boiled water, 120 ml of aloe vera juice, 120 ml of witch hazel extract, 1 tablespoon of white vinegar, 1 tablespoon of olive oil, and 1 tablespoon of castile soap. Cut a roll of paper towels in half, place it in a container, pour the mixture over it, and wait for it to be absorbed.
4. Adding Vinegar to a Warm Bath:
Vinegar can disinfect the body effectively and help treat conditions like Candida. Its acidic nature helps eliminate excess uric acid from the body.
5. Natural Herbicide:
The acetic acid in vinegar has herbicidal properties and can effectively kill most unwanted plants. Spray it directly on the plants to eliminate them within hours.
6. Extending the Life of Cut Flowers:
Lowering the pH level of water with vinegar can prolong the life of cut flowers and reduce the presence of microbes. Mix equal parts of sugar and white vinegar and add it to the flower water.
7. Cleaning Electronic Devices:
To maintain the functionality of computers, printers, and other electronic devices, white vinegar is an effective cleaning agent. Turn off the device, moisten a cloth with a solution of equal parts water and white vinegar, wring well, and gently clean the surfaces.
8. Cleaning Window Blinds:
Cleaning blinds effectively can be challenging, but vinegar can help. Wear a cotton glove, moisten your fingertips with a warm water and vinegar solution, and run your fingers between the blinds. Rinse your fingers in a water container between each blind.
9. Removing Water Marks from Furniture:
Mix equal parts of olive oil and white vinegar, dip a cloth in the solution, wring it out, and gently rub to remove water marks from wood.
10. Removing Carpet Stains:
For lighter stains, mix two tablespoons of salt with 120 ml of vinegar, rub the stain, let it dry, then vacuum. For darker or larger stains, add two tablespoons of borax to the mixture.
11. Cleaner Laundry:
Using white vinegar in laundry helps remove stains, enhance colors, and produce a pleasant scent. Replace fabric softener with vinegar for better results.
Vinegar’s versatility makes it a valuable asset in any household, offering eco-friendly and cost-effective solutions for various tasks.
Here’s a recipe for your super simple and cheap one-pot meal using smoked sausage, broccoli, Knorr cheesy cheddar pasta side, and shredded cheese:
Ingredients: – 1/2 smoked sausage, sliced – 2 cups broccoli florets – 1 package Knorr cheesy cheddar pasta side – 1 cup shredded cheese (cheddar or a cheese blend)
Instructions: 1. Heat a large pan or skillet over medium heat. Add the sliced smoked sausage and cook until browned. Remove the sausage from the pan and set it aside.
2. In the same pan, prepare the Knorr cheesy cheddar pasta side according to the package instructions. As the liquid starts to boil, add the broccoli florets and noodles to the pan. Cook them together until the pasta is tender and the broccoli is cooked to your desired level of tenderness.
3. Once the pasta and broccoli are cooked, add the browned sausage back into the pan. Stir everything together to combine.
4. Sprinkle the shredded cheese over the top of the mixture in the pan. Cover the pan with a lid or aluminum foil and let it sit for a few minutes until the cheese melts.
5. Remove the lid or foil and give the mixture a good stir, ensuring that the melted cheese is evenly distributed.
6. Serve the one-pot meal hot. You can garnish with additional shredded cheese if desired.
Chocolate Covered Coconut Candy is a delectable treat that combines the sweetness of confectioners’ sugar, the crunch of flaked coconut, and the nutty goodness of chopped almonds, all coated in a luscious layer of semisweet chocolate. Let’s dive into the details of crafting this delightful confection.
Ingredients:
INGREDIENTS
1-3/4 cups confectioners’ sugar
1-3/4 cups flaked coconut
1 cup chopped almonds
1/2 cup sweetened condensed milk
2 cups semisweet chocolate chips
2 tablespoons shortening
Instructions:
1. Prepare the Base
In a large bowl, combine confectioners’ sugar, flaked coconut, chopped almonds, and sweetened condensed milk. Mix until well combined.
2. Shape the Mixture
Shape the combined mixture into 1-inch balls. Place the formed balls on a tray and refrigerate for about 20 minutes, allowing them to firm up.
3. Melt Chocolate
In a microwave-safe bowl, melt the semisweet chocolate chips and shortening together. Microwave in 10- to 20-second intervals, stirring until the mixture is smooth.
4. Dip the Balls
Take the coconut balls out of the refrigerator. Dip each ball into the melted chocolate, ensuring an even coating. Allow excess chocolate to drip off.
5. Garnish Creatively
While the chocolate is still soft, garnish the coated balls with ingredients of your choice. Consider additional coconut flakes, finely chopped almonds, or colorful sprinkles.
6. Let Them Set
Place the chocolate-coated and garnished balls on waxed paper. Let them stand until the chocolate is fully set.
7. Enjoy!
Your homemade Chocolate Covered Coconut Candy is now ready to be enjoyed. Indulge in the delightful combination of sweet, crunchy, and nutty flavors!
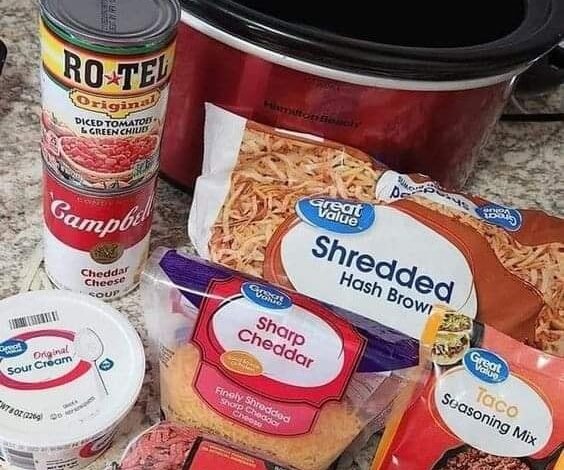
Welcome to the world of savory delights! In this article, we delve into the art of crafting the perfect TACO CROCK POT HASHBROWN CASSEROLE. Whether you’re a seasoned chef or a kitchen novice, this guide promises to unravel the secrets behind a dish that marries the flavors of tacos and the comfort of hashbrowns.
Ingredients:
INGREDIENT
QUANTITY
Ground beef
1 lb
Garlic minced
–
Cheddar cheese soup
–
Frozen shredded hashbrowns
–
Shredded taco style cheese
2 cups (divided)
Instructions:
Cook the Hamburger:
In a skillet, cook 1 lb of ground beef with taco seasoning, minced garlic, and diced onion until the beef is browned.
Combine Ingredients:
In a bowl, mix the cooked hamburger with diced tomatoes and green chiles, cheddar cheese soup, sour cream, and half of the shredded taco style cheese.
Add Hashbrowns:
Incorporate the frozen shredded hashbrowns into the mixture, ensuring an even distribution.
Transfer to Crock Pot:
Place the combined ingredients into a crock pot.
Cooking Time:
Set the crock pot to high for 2 hours or low for 4 hours. Allow the flavors to meld together, creating a delicious casserole.
Serve:
Once cooked, serve the TACO CROCK POT HASHBROWN CASSEROLE hot, garnished with the remaining shredded taco style cheese.
Picture this: the irresistible allure of white chocolate mingling with the light and airy crispness of puffcorn or popcorn. It’s a delightful combination that promises a unique and tasty treat for your holiday gatherings. In this article, we’ll explore the magic of creating a Christmas Munch that’s sure to please both young and old.
Ingredients:
INGREDIENT
QUANTITY
Puffcorn or Popcorn (9 ounces)
1 bag
Almond Bark
9 squares
Festive Sprinkles or Colored Sugar
for garnish (optional)
Instructions:
Put the corn puffs in a large bowl.
Melt the almond bark in the microwave in 30-second intervals until smooth.
Drizzle the melted almond bark over the corn puffs, stir to coat evenly, and then spread out on parchment paper.
Sprinkle with festive toppings and let it set for 1-2 hours.
Enjoy this delightful Christmas Munch at your next holiday gathering! Its combination of sweet and crunchy flavors is sure to please both young and old, making it a perfect treat for the festive season.