Category Archives: Recipes

PINEAPPLE COCONUT SNOWBALLS

We found this recipe in my old recipe’s notebook while searching for a quick, simple recipe to make the day: Pineapple Coconut Snowballs. Just three ingredients, very clear, sure to be easy, and it’s incredibly delicious. I used my tiny cookie scoop to drop balls and some sliced pecans into the coconut that we used on a few of them. We rolled them in the paint and they went into the refrigerator. Just how easy you can get! 

Before serving, they need to cool for at least 5 hours, but they need to be made ahead and because of the cream cheese should be kept in the refrigerator.

INGREDIENTS:

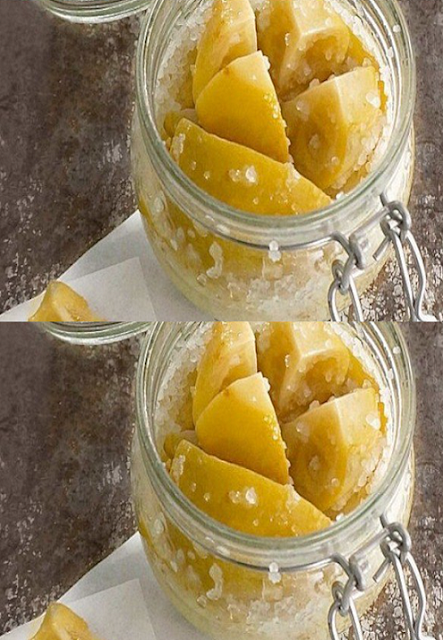
• 1 medium can [8oz] Of crushed pineapple, I drained well,

• 1 PKG.Of [8oz] Of -softened-cream cheese.

• 2  CUPS. And half Of the flaked coconut.

INSTRUCTIONS: 

• Step 1: Using a fine strainer to push as much juice out as possible while draining the pineapple. This makes the combination a little firmer and smoother.

• Step 2:Place the cream cheese and pineapple in a medium bowl. And

mix thoroughly.

• Step 3: Cover them, and for 30 minutes refrigerate in the fridge.

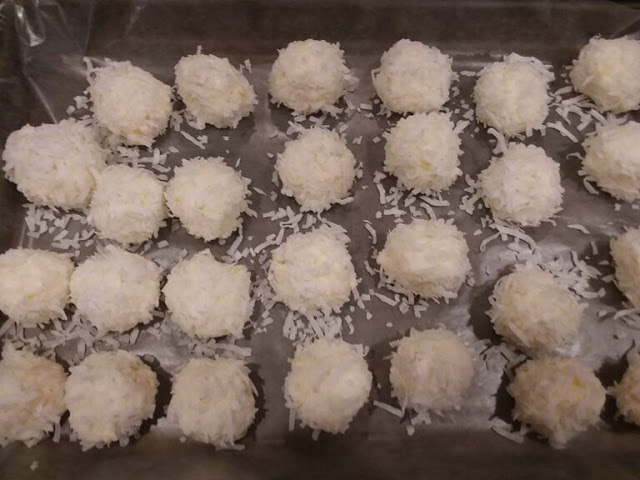
• Step 4:Roll the combination to make 1“ balls, Then roll them in flaked coconut.

• Step 5: It’s better to refrigerate the balls overnight but if you want to serve them immediately let them in the freezer for around 5 hours.

Save this easy recipe to make it later!

DIY Mold Removal

Fed up of mold coming back time & time again ? The most common type of mold found in homes is mildew, which is a surface appearance that multiplies in warm and damp places, such as bathrooms, damp fabrics and stores in the basement, and the mildew initially appears in the form of a gray or white colony and then turns brown or black if it remains For a long time, and if there is a clear musty smell in the house, this means that the concentration of mildew is high, which may come from damp-filled walls, towels or carpets, and here the necessary measures and methods must be taken to get rid of mold naturally.

Ways to get rid of mold naturally Mildew may have an ugly appearance and pose a threat to the health of the home, so it must be completely and professionally disposed of, using the materials necessary to prevent it from appearing again, and these are ways to get rid of mold naturally.

++ Identify areas affected by mold, because growing mold in the house leads to serious health problems, and wood furniture is removed. Wear nonporous gloves on hands during the cleaning process, to prevent skin and skin irritation.

++ Fill a spray bottle with natural white vinegar without diluting it with water, and make sure to fill a sufficient amount to cover the surface to be cleaned. Spray vinegar over the entire affected area.

++ Leave the vinegar on the surface for at least an hour to kill the mold, and then rub the area with warm water and a cleaning brush, while continuing to dip the brush with water during cleaning.

++ Wipe the area that was cleaned, using a clean towel and warm water, and then leave the area to dry with adequate ventilation.

++ It is possible to mix white vinegar with baking soda in the same spray can, to enhance the strength of the product and permanently kill mold, but it is not recommended to mix vinegar with chlorine, as this creates toxic and dangerous fumes.

Preventing mold in the home Preventing mold from multiplying in the home is very important to the health and safety of people, household furniture and its general appearance, because mold negatively affects the purity of the air in the home, and preventing it is not a difficult task.

++ Control of humidity: As humidity is the appropriate environment for the growth of mold, so the house must be kept dry permanently.

++ Opening the windows during the shower: To prevent the accumulation of moisture and dew on the bathroom walls, and upon completion of the shower, dry the walls and the basin with a dry mop, and this process is done after each shower.

++ Do not ignore wet clothes: so that wet clothes do not leave for a long time without spreading them, and do not hang them before making sure that they are completely dry.

++ Treatment of standing water: Spills and floods should be cleaned up immediately, whether on floors, furniture, carpets, bedding or inside walls.

Homemade Pizza

INGREDIENTS:
2/3 cup warm water (110 degrees)
2 1/2 teaspoons active dry yeast
1 teaspoon sugar
1 cup all purpose flour
1 cup bread flour
1 teaspoon salt
2 tablespoons olive oil for the bowl

INSTRUCTIONS
1 Combine yeast, sugar and warm water together in the bowl of a stand mixer. And let set for 5 minutes, the mixture will get foamy.
2 Add in flour and salt.
3 Attach the dough hook and turn the mixer to medium speed. Mix until the dough starts to come together.
4 Reduce the speed to medium-low and beat for 5 minutes until a ball forms. Turn the dough into an oiled bowl.
5 Cover and let rise until doubled. About 35 minutes.6 Use a rolling pin to roll into a circular shape. Place it on a pizza pan and continue stretching the dough until it covers the pan.
7 Use a fork to pierce the dough all over. This step is optional but it will prevent bubbles from forming as the pizza cooks.
8 Top with your favorite toppings! And bake at 430 for 15 – 20 minutes or until golden brown.

Enjoy

HERSHEY’S SECRET KISSES COOKIES

There’s a key to these cookies, or should I say a surprise? Hidden in each cookie is the Kiss of Hershey! You will never know by picking up one of the cookies coated in sugar from these confectioners, but certainly, there is a chocolate surprise in each one! 

I am a huge fan of surprises, especially when they come in the form of dessert. You think there’s one thing you’re having, and then, surprise! It’s better than you thought, it turns out. That is what these cookies do, precisely.

YOU’LL NEED: 

– 3 C.Of powdered sugar.

– 1 PKG.Of Hershey’s Kisses.

– 1+3/4 C.Of All-purpose flour.

– 1 C.Of softened butter.

– 1/2 C.Of sugar.

– 1 C.Of chopped Pecans.

– 1 TSP.OF Vanilla EXTRACT.

DIRECTIONS: 

–STEP 1–Combine the butter, sugar, and vanilla in a cup, and cream until smooth.

–STEP 2–Add in the pecans and flour and whisk until mixed properly.

For around 45 minutes, put the dough in the refrigerator to cool.

–STEP 3–Line 2 baking sheets with parchment paper while the dough is chilling, then cut the wrappers from the Chocolate Kisses.

–STEP 4–Once the dough is chilled, remove it from the refrigerator and use around a tablespoonful of dough, roll it in your palms gently, and push in the middle.

–STEP 5–In the middle of the cookie dough, place a chocolate kiss, and draw the dough up around the sugar.

To shape a ball, roll the dough gently and place it on the parchment paper.

Continue until you have all the dough used.

–STEP 6–Place the cookie sheets for 15 minutes in the oven at 375 degrees, until the bottom edges of the cookies are golden brown.

–STEP 7–Remove from the oven the cookies, and allow them to cool until they are just hot.

–STEP 8–Cover the counter with a clean piece of parchment paper and put the powdered sugar in a bowl.

Place a little bit of powdered sugar on the parchment paper where each cookie is placed.

–STEP 9–Roll them in the powdered sugar in the bowl while the cookies are only sweet, then put them on the powdered sugar on the parchment paper to keep them from sticking.

–STEP 10–Let your cookies cool totally before serving. Then enjoy them!!

Old Fashioned Chocolate Buttermilk Cake

This Simple Chocolate Cake is wonderfully moist

and so delicious with a chocolate fudge frosting.

So Yummy and easy to make… follow the directions!

Ingredient:

Mass:

1 tablespoon (soup) baking powder

1 cup of chocolate powder

2 cups flour for all use

1 cup (tea) sugar

1 cup (tea) milk

5 eggs

Filled & Coating:

3 tablespoons (soup) powder chocolate

1 tablespoon (soup) margarine

Grated coconut or granulated chocolate or

chopped nuts or chocolate sparks to cover

1 can of milk cream

2 cans of condensed mil

Cake moisture syrup

2 tablespoons (soup) powder chocolat

1 cup of mil

1 cup of wate

Preparation mode

Dough

Beat the egg whites until they are stiff, add eg

yolks one by one, the sugar, and continue beating

Then milk very little by little, turns off and sift flou

and chocolate over the dough and stir gently

Finally, put the yeast and mix, the dough must b

taken well and look soft as foam, so put the mil

gradually so you don’t miss the poin

Place in a pan (approximately 26 x33 cm or 30 c

in diameter) oiled and flour (if you prefer to greas

the pan and sprinkle chocolate powder, replacin

the flour, so the cake is darker).

Bake in a medium oven, until a toothpick, will

come out clean, approximately 15 minutes,

depending on the oven.

Filled:

Carry medium / low fire in a pan: condensed milk,

chocolate powder, and margarine until it comes

out of the pan (brigadeiro point).

Wait for it to cool and add the cream gradually and

stir until it’s very creamy and easy to mix so much Propagation

Syrup:

Mix everything and cook high until it’s halfway

down.

the century, Cut the cake into 2 parts soak with

syrup and fill and cover with brigadeiro filling.

Sprinkle with grated coconut or nuts or granulated

chocolate or shave and serve.

Enjoy

WHAT A ELEGANT HOME-MADE THICK DUTY FLOOR CLEANER !

One of the best things about this 365-day blog is that I can do things I don’t usually do. How to clean the floor.I clean the floor, but not as often as I should. I hate playing, oh!On the lower floors, I now have a thicker floor cleaner that can reduce dirt.The kitchen is not that bad. I love parquet floors because a damp paper towel will do the job most of the time. But the bathrooms?I live in a man’s house.Anyone with children knows the smell of a boy’s bathroom. I swear it’s on the wall. “I can scrub all surfaces and wipe the floor with my hands and knees, and still walk around the house like an Oscar Grouch version of the Glade plug-in.

This recipe is for tough cleaning like in a commercial kitchen.

Designed as a grease
cutter.But my appreciation for reviews is that someone wrote “it smells great” in the description.Why use expensive chemicals when they are not needed?Seriously, my bathroom smells very good because the floor looks clean.

Ingredients :

  • 1 ½ lbs Ground beef
  • 1 Cup Chopped onion
  • 3 oz Cream cheese
  • 1 Packet Taco seasoning
  • 1 Can Green chilis
  • 2-3 Cups Fritos corn chips
  • 1 Cup Shredded taco blend cheese
  • 1 Chopped Roma tomato
  • 1-2 Cups Shredded lettuce
  • Salsa and sour cream for garnishing

Cooking Instructions:

Start by preheating your oven to 350°F (175°C).
In an oven-safe skillet, combine the ground beef and chopped onion. Cook this over medium-high heat until the beef is thoroughly browned and the onions are tender.
Next, incorporate the taco seasoning, green chilis, and cream cheese into the skillet. Continue to sauté until the cream cheese fully blends in.
Layer the skillet’s mixture with corn chips followed by the shredded cheese.
Bake the casserole in the preheated oven for 20 minutes.
Once done, remove the skillet from the oven and sprinkle it with shredded lettuce and chopped tomato.
Add the finishing touch by garnishing with salsa and sour cream as per your preference.
Enjoy your Stroll-In-Your-Mouth Taco Bake!

Butter Milk Pie

Have you ever tried something so delicious you can barely stand it…and something that you’re even more shocked that you actually made. This is one of those recipes.

Buttermilk Pie is my nominee for this year’s perfect party dessert awards. It’s outrageously easy to make, the filling is luxuriously sweet and creamy on the inside with a lightly crackled sugar top, and despite being an old-fashioned, classic Southern recipe, it doesn’t receive the notoriety it deserves.

A sweet simple traditional Buttermilk Pie made with wholesome natural ingredients with minimal effort and time. For an extra special treat serve with fresh whipped cream.!To Make this Recipe You’ Will Need the following ingredients:

Ingredients :

1 3/4 C. sugar
1 stick unsalted butter (1/2 C.) room temp.
3 large eggs
1/4 tsp. vanilla extract
pinch of salt
3 T. all purpose flour
1 C. buttermilk
1 9″ pie shell, unbaked

Directions :

Cream together the sugar and butter till well blended. Beat in the eggs, 1 at a time, until the mixture is nice and smooth. Add in the vanilla, salt and flour. Beat in the buttermilk until well combined. Place the pie shell on a baking sheet lined with foil (catches any overflow).
Fill the pie shell with the buttermilk mixture, just to the top of the shell. Pour any remaining into an ungreased custard cup. Bake at 300 degrees for 1 hour 10 minutes. Remove from the oven and let set until almost cooled before serving. Store covered in the fridge.

How to Make DIY Dawn Powerwash Refill

How to make a copycat Dawn Powerwash refill recipe. Use this DIY Dawn Powerwash for washing the dishes or cleaning.
Dawn Powerwash is a foam spray that you can use for dishes. I like it because only a little bit comes out at a time, so it’s perfect for washing a few dishes at a time. I also use it for greasy foods or stuck on food so they can soak for a few minutes. You can learn other ways to use it in this DIY Dawn Powerwash refill hack post.

Step 1: Gather Materials
To make the homemade Dawn Powerwash, you’ll need a Dawn Powerwash spray bottle, blue Dawn dish soap, and rubbing alcohol. The perfect doesn’t matter for the alcohol. It’s not enough to disinfect anyway, even if you use 99 percent. It’s there for more scrubbing power.

Step 2: Take Measurements and Add Water
To make 32 ounces (a quart), you’ll need 26 ounces water, 4 ounces blue Dawn, and 2 ounces rubbing alcohol. Put the water in the mason jar.

Step 3: Add Alcohol and Dish Liquid
Then add the alcohol and the Dawn dish liquid. Put the lid on and let it sit for a few hours. This helps the Dawn and rubbing alcohol really mix with the water.

Step 4: Refill Powerwash
After a few hours, you can refill your bottle with the DIY Dawn Powerwash and use it like you usually would.

KICKIN FRIED CHICKEN

Ingredients :

8 pieces of chicken, your choice breast, thighs, legs, etc.

1 C. milk

2 T. pickle juice

1 tsp. Tabasco sauce

1 egg, beaten

2 C. flour

1/2 tsp. paprika

1/2 tsp. garlic powder

1/4 tsp. onion powder

1/4 tsp. ground sage

1/4 tsp. cayenne pepper

1/4 tsp. black pepper

1/4 tsp. salt

1/4 tsp. oregano

Directions :

Combine milk, egg, Tabasco and pickle juice.

Throw the chicken in with it and marinate for 1 hour in the fridge.

Combine all remaining ingredients in another bowl for dredging.

Now I used a deep fryer, but you can use an iron skillet and heat oil to 350 degrees.

Dredge the chicken in the flour, back to the mixture it was marinating in and then back into the flour.

Place on a cookie sheet and continue with the remaining pieces.

Let sit for 5 minutes before frying.

Place 2-3 pieces at the time in the fryer and cook for 7-8 minutes boneless or 10-12 bone in turning as you go. Just make sure the internal temp. is 160 degrees’.

You can heat the oven to 250 degrees and place the chicken on a cooling rack over a cookie sheet to stay warm and crisp while finishing up the rest.

Source : myfridgefood.com

Lemons, Why Dip In Salt: Grandma’s Old Trick

Storing lemons in the refrigerator may not be the best solution, as the refrigerator temperature can dehydrate the lemons and “dry out” the zest of the citrus fruits. What is the best way to store lemons when you have a lot of them? We will find out.
Mold often forms on lemons. The origin of mold formation depends on climatic conditions, but also on the harvest and distribution of citrus fruits. If lemons are damaged during transportation, the citrus fruits themselves are at risk of mold growth.
Acidic PH makes lemons more susceptible to fungus spores. Indeed, mold proliferates more in acidic environments.
The mold attacks lemons, but in no way makes them toxic or harmful to the touch or smell. We will find out how to store lemons in such a way as to avoid the formation of mold

Here is the method to prevent the attack of spores:
Please note that it is entirely possible to preserve lemons at home, while protecting them from spores. Here’s what you need to do:
Cut lemon slices.
Pour water and salt into a container.
Place the washers in the container.
Close it tightly and shake.
Store for months.
Pickled lemons can keep their freshness very well for a long time, thanks to the special property of salt.