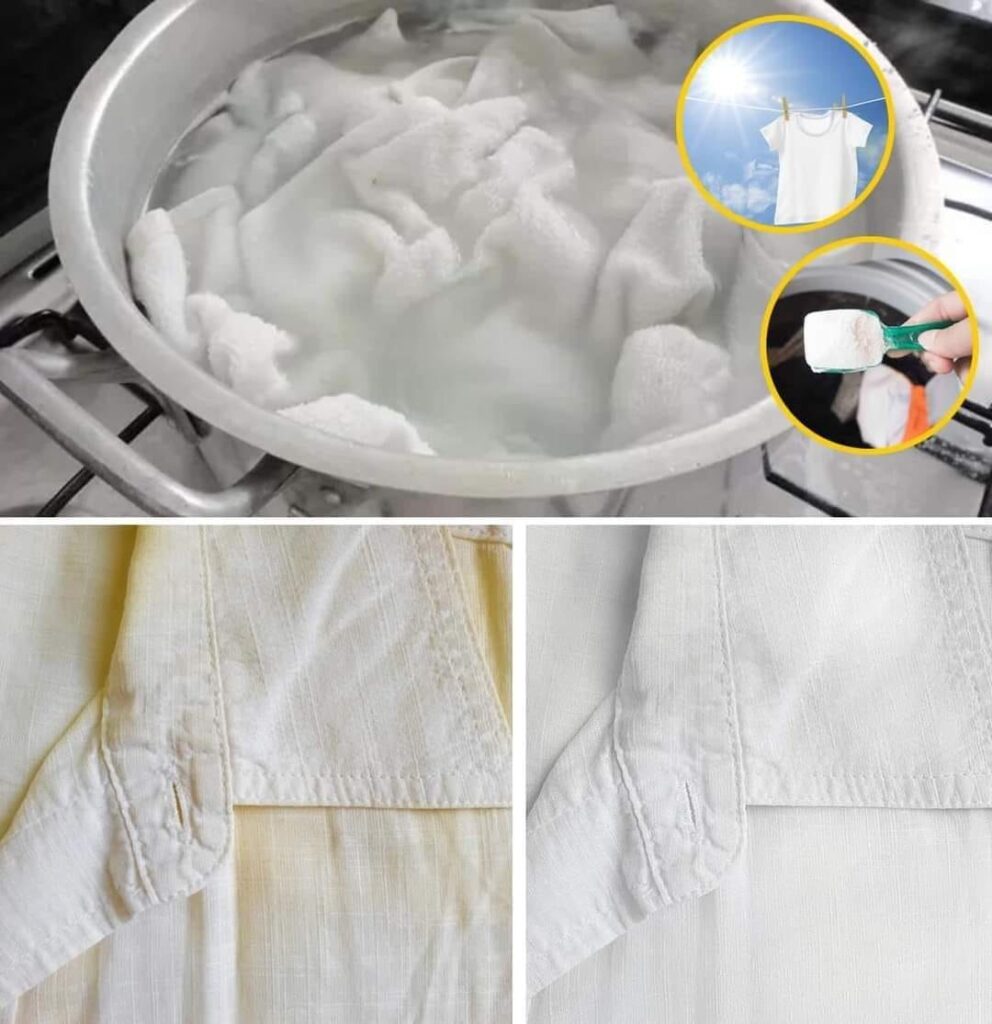
Over time, our favorite white garments can lose their brightness, and unsightly yellow stains may appear, leaving us puzzled and frustrated. However, fear not! With a few simple tips and tricks, you can rejuvenate your laundry and bid farewell to those stubborn yellow marks. Let’s explore how to whiten your laundry and say goodbye to old stains.
Understanding Yellow Stains:
Yellow stains on white clothing are a common issue and can be caused by a variety of factors, including:
Sweat and Body Oils: The natural oils produced by our bodies, combined with sweat, can contribute to yellowing over time.
Deodorant and Antiperspirant: Residue from deodorant or antiperspirant can build up on clothing, leading to discoloration.
Detergent Buildup: The use of too much detergent or inadequate rinsing can result in detergent residue, contributing to yellowing.
Mineral Deposits: Hard water can leave mineral deposits on clothing, affecting their color.
Whitening Your Laundry:
1. Sort Your Laundry:
Before starting the whitening process, sort your laundry. Keep whites separate from colored items to prevent color bleeding.
2. Pre-Treat Yellow Stains:
For targeted stain removal, pre-treat yellow stains with a mixture of equal parts lemon juice and salt. Apply the mixture to the stain, let it sit for 15-30 minutes, and then launder as usual.
3. Baking Soda Boost:
Add 1/2 cup of baking soda to your laundry load along with your regular detergent. Baking soda is a natural brightening agent that helps lift stains and freshen fabrics.
4. White Vinegar Rinse:
During the rinse cycle, add 1/2 to 1 cup of white vinegar to the washing machine. White vinegar helps break down detergent residues and contributes to overall whiteness.
5. Oxygen Bleach (Optional):
If your whites need an extra boost, consider using oxygen bleach (not chlorine bleach) as directed on the product label. Oxygen bleach is gentler on fabrics than chlorine bleach.
6. Sunlight Exposure:
Take advantage of the natural bleaching properties of sunlight. Hang your whites to dry in direct sunlight, and the sun’s rays will help brighten and whiten your laundry.
Tips for Maintaining Whiteness:
Avoid Overloading: Overloading the washing machine can prevent clothes from getting adequately clean. Ensure there’s enough space for water and detergent to circulate.
Use the Right Detergent: Choose a detergent specifically designed for whites, and follow the recommended usage instructions.
Regular Maintenance: Incorporate a regular laundry maintenance routine to prevent yellowing. Treat stains promptly, and don’t let them set in.
Address Hard Water Issues: If you have hard water, consider using a water softener or adding vinegar to your laundry routine to combat mineral deposits.
Check Care Labels: Always check the care labels on your clothing for specific washing instructions to preserve their quality.
Bid Adieu to Yellow Stains:
By following these simple steps and incorporating these tips into your laundry routine, you can revive the brilliance of your whites and say goodbye to those pesky yellow stains. A combination of natural brightening agents, targeted stain treatments, and proper care can make a significant difference in restoring the vibrancy of your wardrobe. Embrace the confidence of wearing crisp, white clothing that looks and feels like new!
1/2 cup Land O’ Lakes butter, or vegetable shortening
3 tablespoons cold water
Filling
1-1/4 cups Domino sugar
1/4 cup Argo cornstarch
3 tablespoons Gold Medal all-purpose flour
1/4 teaspoon salt
1-1/2 cups water
3 egg yolks, lightly beaten
2 tablespoons Land O’ Lakes butter
1-1/2 teaspoons grated lemon peel
1/3 cup lemon juice
Meringue:
1/2 cup Domino sugar, divided
1 tablespoon Argo cornstarch
1/2 cup cold water
4 egg whites
3/4 teaspoon vanilla extract
Directions:
Preheat oven to 425 degrees.
Combine flour and salt in a small bowl, then cut in shortening until crumbly. Gradually add 3 tablespoons cold water, tossing with a fork until dough forms a ball.
Roll out pastry to fit a 9″ pie plate. Transfer pastry to pie plate. Trim to 1/2″ beyond edge of plate; flute edges. Bake for 12-15 minutes or until lightly browned. Remove from oven, and lower the oven temperature to 350 degrees.
For filling, in a large saucepan, combine the sugar, cornstarch, flour and salt. Gradually stir in water until smooth. Cook and stir over medium-high heat until thickened and bubbly. Reduce heat; cook and stir 2 minutes longer.
Remove from the heat. Stir a small amount of hot filling into egg yolks; return all to the pan, stirring constantly. Bring to a gentle boil; cook and stir 2 minutes longer. Remove from the heat. Gently stir in butter and lemon peel. Gradually stir in lemon juice just until combined. Pour into the crust.
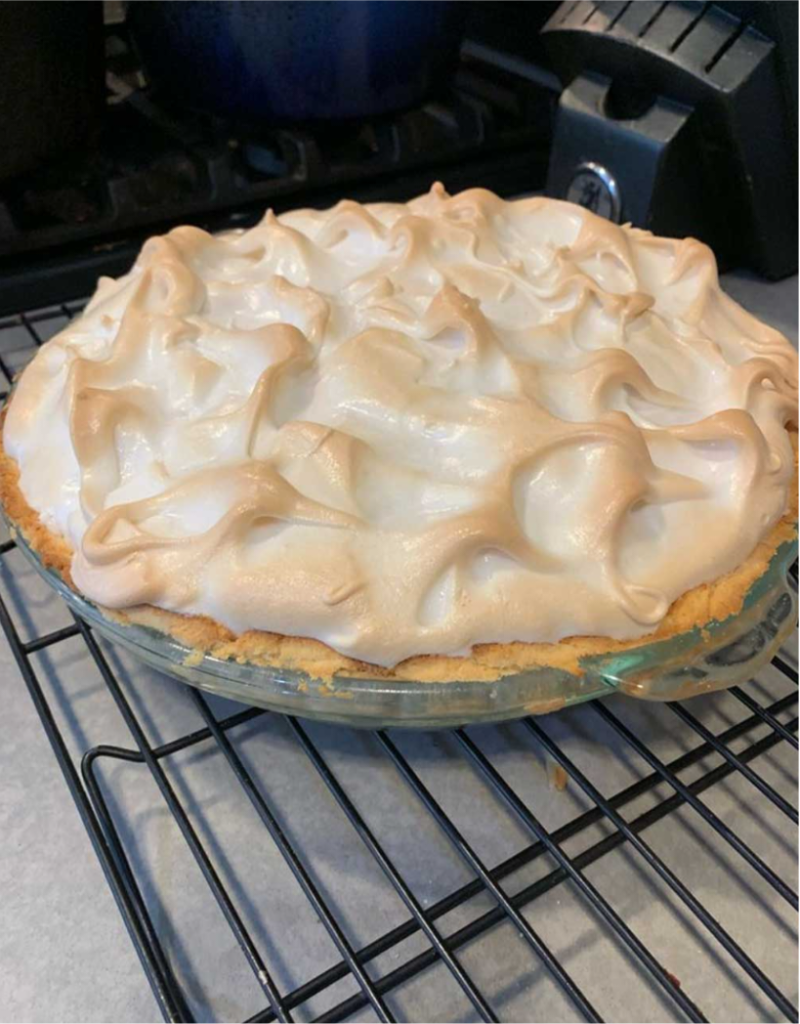
For meringue, in a saucepan, combine 2 tablespoons sugar and cornstarch. Gradually stir in cold water. Cook and stir over medium heat until mixture is clear. Transfer to a bowl; cool. In a large bowl, beat egg whites and vanilla until soft peaks form. Gradually beat in the remaining sugar, 1 tablespoon at a time.
Beat in cornstarch mixture on high until stiff glossy peaks form and sugar is dissolved. Spread evenly over hot filling, sealing edges to crust.
Bake at 350° for 25 minutes or until the meringue is golden brown. Cool on a wire rack for 1 hour. Refrigerate for at least 3 hours before serving. Refrigerate leftovers.
I remember when I was a kid, my mother used to make this beautiful beef stew during winter. I loved it so much. And now, with the winter coming, I remembered this recipe!
You’ll Need:
2 tbsps of olive oil. 2 pounds of cubed beef stew meat. 2 tbsps of all purpose flour. 4 cups of water. 2 cups of beef broth. ½ tsp of salt. ½ tsp of ground black pepper. 4 cups of cubed potatoes. 2 cups of chopped carrots. 1 tsp of dried rosemary. 1 cup of fresh corn kernels. 1 cup of fresh green beans cut into 1” pieces. 1 cup of chopped turnip (optional). 2 cups of chopped fresh tomatoes (optional).
How to:
In a large pot, heat the oil and stir in the beef and flour until browned.
Pour in the water and broth and season with salt and pepper. Bring to a boil, reduce the heat and simmer for 1 hour.
Mix in the potatoes, carrots and rosemary and simmer for 1 to 2 more hours.
Mix in the corn, green beans and simmer for 30 minutes and Voila!
Simple, easy and delicious!
This beef stew is super delicious. I love tomatoes, so I use them, and I advise you do the same if you are trying this recipe!
This delicious Pan Fried Potatoes and onions Recipe is a way to up your game in the kitchen. Perfectly browned on the outside and tender on the inside, these potatoes and Onions will be a hit with your whole family. It is a versatile Side Dish for breakfast, brunch, or dinner. It is comfort food that goes with just about any main Dish.
Ingredients
4 large Yukon Gold type potatoes.
1 large onion, finely cut into rings.
1 teaspoon of butter.
1 teaspoon of olive oil.
½ teaspoon of garlic powder.
1 pinch of dill (or the herb / herb of your choice).
1 pinch of salt and pepper
How To Make Fried Potatoes And Onion
Start by peeling your potatoes. Cut them into thin slices.
Do the same with your onion.
In a large frying pan, and over medium heat, melt the butter and pour in the olive oil.
Place the potato rings and onion rings in your pan.
It’s a perfect side dish with chicken, pork, or beef.
I love corn on the cob! Whether it’s grilled, smoked, or otherwise, and this Milk Butter Boiled Corn on the Cob is the best hands down! It’s just as easy as boiling or steaming corn on the cob, but this version is so superbly sweet and soft that you will make it your new ‘go-to’ method of cooking your corn!
Nothing can compare to fresh corn on the cob, cooked quickly, coated with sweet butter, and sprinkled with salt.Eating two corn on the cob per person seems to be the right meal, but when the corn is just harvested, the appetite will increase.
What you will need :
° Sparkling corn in the cob, peeled and clean ° water ° 1 m. milk 1/2 stick butter ° 1 T. Sugar
How to make it :
Place the corn in a large bowl and load enough water to submerge the corn. Add milk, butter and sugar and stir to mix water and milk. Bring to a boil on the med. Overheat, once boiling, reduce heat to medium and put a lid on the saucepan. Cook for 25 minutes to get crisp and bland, or longer as desired.
Place chicken pieces in a large bowl or ziptop bag. Cover with buttermilk, stir in salt, pepper and garlic powder and marinate 2 hours to overnight (this is optional but definitely recommended).
Remove from buttermilk and pat dry with a paper towel. Sprinkle lightly with salt, pepper and garlic powder. Set aside.
Place a rack over a rimmed baking sheet and set aside. Whisk together the eggs, water and hot sauce. In another bowl, whisk together the flour, salt, pepper, paprika and cayenne pepper.
Dredge the chicken in the flour mixture then coat it in the egg mixture. Return to the flour mixture and coat. Place chicken on the rack. Once all pieces are coated, place in the refrigerator for 30 minutes. This step helps the coating stick to the chicken.
Meanwhile, heat the peanut oil to 350 degrees F. Working in batches, fry chicken for about 15 to 18 minutes, or until no longer pink and cooked through. Keep in mind that dark meat will take a little longer to cook than white meat. Watch the wings as they may cook in less than 15 minutes. Place chicken on a clean rack to help keep it crispy as you cook another batch.
Welcome to the delightful world of baking, where we explore the magic of creating a Pineapple Cream Cheese Pound Cake. This heavenly dessert is a symphony of flavors, blending the richness of cream cheese with the tropical sweetness of pineapple. Let’s embark on a culinary journey and master the art of baking this mouthwatering delight.
Ingredients:
INGREDIENT
QUANTITY
Unsalted Butter
1 1/2 cups, at room temperature
Cream Cheese
1 (8 oz) package, at room temperature
Granulated Sugar
3 cups
Large Eggs
6
All-Purpose Flour
3 cups
Baking Powder
1/2 tsp
Salt
1/2 tsp
Vanilla Extract
1 tsp
Crushed Pineapple (drained)
1 (20 oz) can
Instructions:
Preheat Your Oven:
Set the oven to 325°F (165°C).
Grease a 10-inch bundt pan with non-stick cooking spray.
Prepare the Batter:
In a large mixing bowl, beat together the unsalted butter, cream cheese, and granulated sugar until the mixture is light and fluffy.
Add Eggs Gradually:
Add the large eggs one at a time, beating well after each addition.
Prepare Dry Ingredients:
In a separate bowl, whisk together the all-purpose flour, baking powder, and salt.
Combine Wet and Dry Ingredients:
Gradually add the dry ingredients to the butter mixture, mixing until just combined.
Add Vanilla and Pineapple:
Stir in the vanilla extract and the drained crushed pineapple, ensuring an even distribution of ingredients.
Pour into Bundt Pan:
Pour the batter into the prepared bundt pan, smoothing the top with a spatula.
Bake:
Bake for 1 hour and 30 minutes or until a toothpick inserted into the center comes out clean.
Cool the Cake:
Let the cake cool in the pan for 10-15 minutes.
Invert and Serve:
Invert the cake onto a wire rack to cool completely.
How many times have you cracked an egg into a bowl of other ingredients, only to question whether the egg has gone bad or not? Unfortunately, eggs are not the easiest ingredient to determine the freshness of as the protective opaque shell hides the condition of the white and yolk.
But there are a few easy ways to tell if an egg is fresh and there are plenty of things you can do to prevent your eggs from going bad in the first place.
In this article, let’s go over some tips that will help you know if an egg is still good to eat or if it’s expired.
In France, there are nearly 10 million tonnes of food that end up in the trash every year.
People often prefer to throw away food when the expiration date has passed.
Although in France, the number of eggs that end up being wasted remains unknown, the British media The Guardian, which cites the work of the anti-waste community Too good to go, reports that in the United Kingdom, there are 720 millions of eggs that end up in the trash every year.
The main reason for this waste is the fact that 77% of Brits struggle to know if an egg is fresh after it has passed its use-by date.
Do you want to prepare a brunch but you don’t know how long your eggs have been in the fridge? Do not panic. There are ways to know if they are consumable or not:
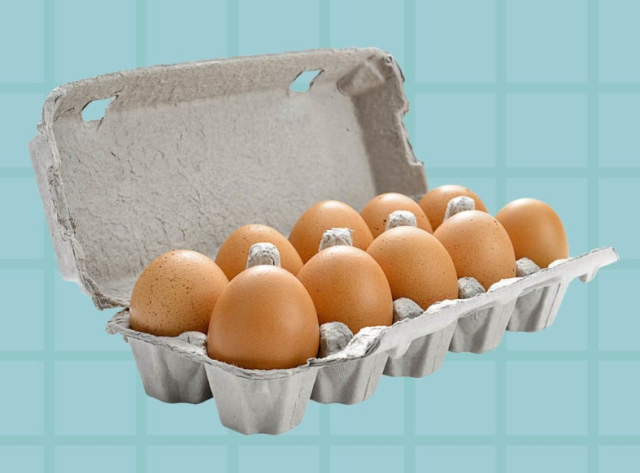
1. Check expiration dates
The eggs you buy at the supermarket all have a recommended use-by date which is indicated on their packaging.
In addition, French regulations require the distributor to no longer sell eggs 7 days before the minimum durability date (Ddm) written on the packaging, as explained on the Femme Actuelle website.
But if you stock up on eggs from the henhouse, the recommended use-by date is not indicated. Therefore, you should know that the use-by date (Dlc) is a maximum of 28 days after the day of laying.
However, eggs can be stored in the refrigerator for one month past the recommended use-by date, which is 58 days after the day they were laid, if the shells are not cracked or broken. Storing food in optimal conditions helps maintain its freshness, avoid mold and actively fight against food waste.
Compliance with the cold chain and deadlines is necessary to avoid pathogenic organisms that pose a health risk. Thus, putting eggs in the refrigerator helps preserve their taste and nutritional qualities and prevents the growth of bacteria.
However, you should definitely not wash eggs that are not going to be eaten immediately, as this risks causing them to lose the protective film that the hen leaves on them. But if the dates are not on the packaging, it is necessary to find other ways to find out if they are expired.
2. Smell the egg
Like fresh products such as cheeses, desserts, crème fraîche, or even yogurts, eggs can have a suspicious smell once the deadline has passed.
So, if you notice that the egg is past the expiration date and you want to keep the product for later consumption, start by smelling it. Expired food often has an unpleasant odor and should not be eaten. They may have lost their vitamins and have an altered taste.
In addition, perishable food products have a limited shelf life and can be dangerous for your health if the expiration dates are not respected. Expired eggs, whether cooked or raw, may give off a distinctive odor.
If you can’t decipher the label and the smell isn’t enough to tell you something, you can crack the egg into a bowl or salad bowl and smell it, says registered dietitian Taylor Jones. And if the smell puts you off, throw the egg away and wash the container with hot water.
If the smell seems normal to you, you should consume the egg quickly by preparing an omelette for example.
3. Check the appearance of the shell
Your eyes can also help you identify whether an egg is expired or edible.
Before consuming a product, it is best to visually inspect it to avoid any risk. According to the specialist, it is necessary to check whether the shell is not powdery, viscous or cracked.
Any questionable appearance may reveal the presence of mold. Additionally, if the shell is dry and appears to be in good condition, crack the egg into a bowl and identify any suspicious discoloration.
Typically it is a blue, pink, black or green color in the egg white or yolk. In fact, it can reveal the growth of bacteria that can cause food poisoning.
As confirmed by Dr. Julia Roux, gastroenterologist, salmonella are bacteria that can be found in eggs and preparations made from raw or undercooked eggs, as well as in dairy products.
These germs can cause salmonellosis, an intoxication which causes symptoms such as fever, diarrhea, vomiting and even abdominal pain.
Additionally, if the egg yolk or white is leaking, this may indicate that the egg is aged but may not have reached its usage limit.
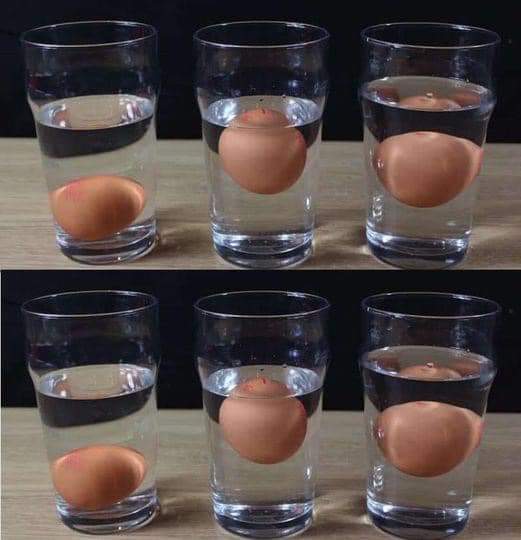
4. Dip the egg in water
According to LCI, another technique can be effective in determining whether the egg is still edible.
To do this, you must immerse the egg in a saucepan or salad bowl filled with water. If it sinks to the bottom of the container, it is still good for consumption.
But if it remains erect, that means it needs to be eaten quickly. If it rises to the surface, it is expired.
In fact, the older the egg gets, the more moisture evaporates through microscopic pores and the air pocket gets bigger. Therefore, the older the egg is, the more it floats.
However, if you want to consume eggs immediately, do not repeat this experiment.
This dip can cause loss of the cuticle on the shell. However, the latter protects the egg from bacteria such as salmonella.
5. Use the mirage technique
Candling is a technique for assessing egg quality or chick development in a fertilized egg.
Generally, this technique is carried out in the industrial environment using specialized equipment allowing table eggs to be classified before labeling and packaging them.
But you can still do the method at home, if you want. To do this, you need a cool place with little light.
Have a light source like a candle or a small flashlight. Hold the light source towards the end of the egg then tilt the egg and turn it from left to right. The contents of the egg should be visible.
This technique allows you to see if the air bubble is small or large. As the egg ages, the water evaporates and is replaced by gases. Thus, the larger the air pocket becomes, the more the egg is aged.
Can we eat food after its expiration date?
Some foods can be consumed several days after the expiration date stated on the package. However, a person who consumes raw fish, eggs or even expired meat takes health risks.
Although we are all against food waste, it is necessary to carefully check the packaging of the products we buy in supermarkets to ensure that their consumption is safe. In fact, passing the expiration date of a perishable product exposes you to various illnesses.
Here is a list of foods that can be consumed after the expiration date, relayed by our colleagues at Femme Actuelle:
Foods that never expire:
Certain foods like real honey which has many health benefits, salt, sugar or even vinegar never expire and can be kept forever.
Foods that do not expire, except in certain cases:
Cans, rice, pasta, cornstarch, flour, cereals or even dried vegetables can remain intact well after the marked expiration date on the packaging. However, these products can be infested with food moths and undergo spoilage.
Foods that can be consumed after the expiration date
Mustard, ketchup, pickles or even spices can be stored and consumed well after the expiration date. In reality, the expiration dates of these foods may have passed. However, their taste can change over time.
Other foods that can be consumed after the expiration date include dairy products such as crème fraîche, cheese, milk and yogurt. These, if unopened, can be consumed one to two weeks after the date mentioned.
To know if they are good, check the packaging. If it has swollen, potentially dangerous bacteria has developed and it is best to throw the products away. In addition, a pungent, acidic smell may indicate that they have gone bad.
Furthermore, frozen products can be consumed after the date mentioned on the packaging, if the cold chain has been respected. If stored properly, raw fish can be kept for 6 to 9 months past the expiration date. For poultry and fruits and vegetables, the period extends to one year. However, frozen meals keep less well than packaged products.
Foods you should definitely not eat after the expiration date
Bacteria are more likely to reside in particular foods. This is the case for vacuum-packed raw meats, eggs and fish as well as cold meats.
Therefore, to protect your health and avoid a potential food infection, you must scrupulously trust the expiration date mentioned in these foods.
Additionally, if the packaging swells, this may indicate that bacteria such as salmonella, listeria or escherichia coli are proliferating in the food. Additionally, if you open these bacteria-contaminated products, you will observe a gelatinous appearance and notice an off-putting odor.
Furthermore, fresh fruit juices can contain bacteria if you do not respect the expiration date, as can raw milk cheeses. And for good reason, fresh cheeses are vulnerable to bacteria and it is necessary to pay attention to any suspicious color and odor.
Finally, salads sold in bags may contain bacteria. In this sense, it is essential to respect the expiration date displayed on the packaging.
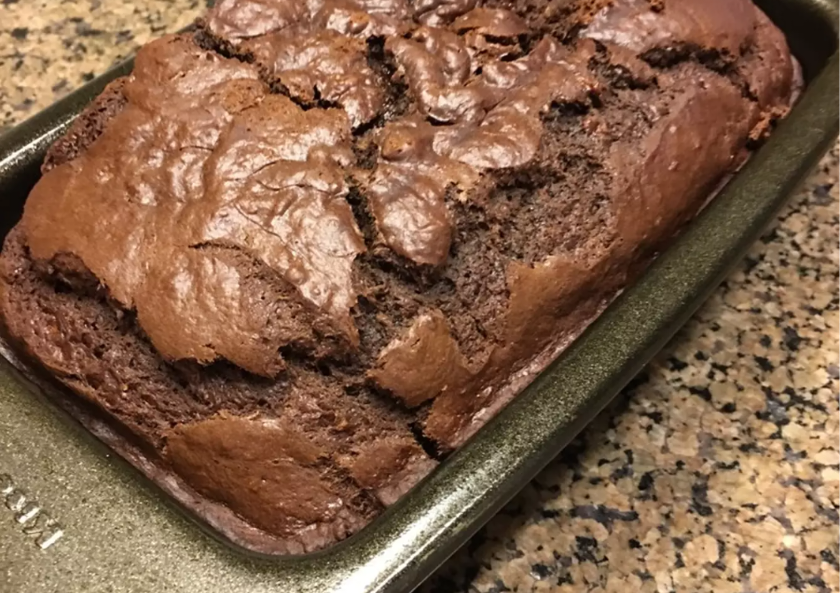
Imagine sinking your teeth into a slice of warm, moist brownie bread, oozing with velvety hot fudge sauce. If that sounds like a dream come true, then you’re in for a treat with our Hot Fudge Brownie Bread recipe. This delectable dessert is a fusion of classic brownies and irresistible hot fudge sauce, resulting in a delightful indulgence that’s perfect for any occasion.
Hot Fudge Brownie Bread: A Fusion of Flavors
There’s something truly magical about combining the rich, chocolatey goodness of brownies with the gooey decadence of hot fudge sauce. In this recipe, we’ll guide you through the process of creating this heavenly treat step by step.
Ingredients
3-4 very ripe bananas
1/3 cup melted butter
1 teaspoon baking soda
1/4 teaspoon salt
1 1/2 cups granulated sugar
1 large egg beaten
1 teaspoon vanilla extract
1/2 cup corn oil
1 1/2 cup all purpose flour
3/4 cup Hershey’s Cocoa
1/2 cup Hershey’s chocolate syrup
Cooking Instructions
Step 1Preheat oven to 350 and butter a 4×8 loaf pan
Step 2Mash banana and add melted butter
Step 3Mix in baking soda, salt, sugar, egg, vanilla extract, flour, oil, and cocoa
Step 4Add chocolate syrup and mix well
Step 5Put into loaf pan and bake for 50-60 minutes
Step 6Serve warm or let cool.
Step 7OPTIONAL: Add nuts if desired
Step 8Serving suggestion: Slice banana over each slice and dust with powdered sugar for a decadent dessert